Information contained above this line was not
contributed by the owner of this site

INSTALLATION OF ROTARY EXTREME FEED STYLE CARBON FIBER SIDESKIRTS
 My Homage to "Rice"- sideskirts
The Last of the Exterior Modifications
As with the installation of the '99 style front bumper I never thought I'd
install any more aftermarket body parts on my car. Simply not my thing.
But, and there is always a "but," I had come across a component that really did catch my eye.
With the installation of the '99 front bumper and now more coherent integration of the '99 front lip
the flowing lines of the car has been somewhat lost. Specifically the bigger tail end of the
black '99 front lip (vs the '93 front lip) did not continue the "line" down the rest of the length of the car. Something
was needed. However, it certainly was not the sideskirts we are all too familiar with. You know...sideskirts that
flow, or not flow depending on your viewpoint, halfway up the side of the car. Perusing the web and
FD related material I found an interested compromise. Japanese tuner and maker of aftermarket parts,
FEED, had a circuit car (Type II R) that had these rather snazzy but yet low key sideskirts. They were essentially a horizontal
rail running the length of the car directly under the sill. Hmmm. Would be nice in that it would
cover the ugly sill flange now mangled by years of jacking the car up and down and to top it off would
also improve the looks by keeping the flow from the '99 front lip down the length of the car. In my opinion
of course. Now the engineering reason for sideskirts is to keep the flow of air under the car, to be funneled
to a diffuser in the rear, and aid in generating aerodynamic downforce. However, one must be honest in that these sideskirts
serve no engineering or aero purpose as 1) the car is too high off the ground to generate any underbody
aero downforce and 2) without the other aero aids that no doubt were engineered by FEED to go with these
sideskirts (see the *real* FEED circuit car), no areo gain is there to be had with just the skirts alone.
Nonetheless I set out to find a set of FEED Type II R side skirts...until I saw the price. $650.00! Ummm...no thanks.
Dang it! And then low and behold seems I wasn't the only one smitten by the FEED sideskirts as a gent
on the RX-7 Club forum proposed a group buy of this "style" sideskirt. Rotary Extreme kindly obliged
and offered knockoff FEED sideskirts at what was a respectable price. And as the number of buyers
increased the price dropped even more. I was all smiles. And so it was I came to buy a set of Carbon Fiber
FEED "style" sideskirts.
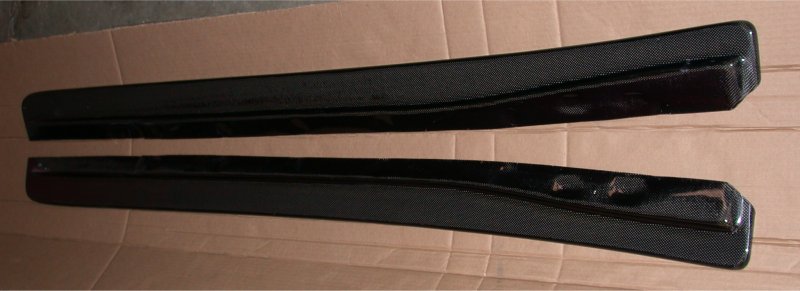 "FEED" Carbon Fiber Sideskirts
Installation - Easy as one...two...three..........four...five...six...
How hard can it be to bolt these skirts onto the car. A few screws and viola...right? Well yes and no.
Being the obsessive compulsive, anal retentive kinda guy I am I chose to install them the long way
to the tune of about 4 hours of labor. First off was removal of the front mudguards (more on that later) to uncover
about 5 years worth of road goop and grim underneath. Protected the paint from rock chips but still a mess.
Time to break out the cleaner and car wax....ended up doing the entire side of the car and undeneath the car to the
sill weld seam as it would be partially visible too. Goodbye one hour. The rear rock deflectors also needed to
come off. No biggie there - just a coupla screws. Now with any installation, prep work is the key. Measure twice
or 5 times in my case, cut (drill) once. So where are these skirts going to mount and how to mark the holes?
The skirts themselves actually have indentations that denote were certain chassis undulations/drain holes,
or mounting points etc., are located. I decided to use the two rear indentations that marked where the rear rock
deflector anchors were inserted into the chassis. To mark the locations of the holes exactly I put a
bit of putty onto the skirt and placed the skirt where I wanted it (supported with wood blocks).
Think hard about this! Take a step back and view from several angles to be sure you like where it is.
Press the anchors into the putty when you are sure of the location of the skirts and
the anchors leave perfect indentations in the putty exactly where the holes are to be drilled.
I drilled these two holes and then lined up the two front fender
bolt holes - yes I removed the two lower fender bolts. Kinda tricky but with a bit of inginuity the location
of one of the front fender bolts holes can be marked on the skirt also. I mounted my skirts far enough "out" that I
did not use the forward - inset - fender bolt for mounting. With the front (You might need to find a longer 10mm
bolt for the fender hole) and rear of the skirt held in place it
was easy to drill holes for the other mounting points. I drilled 4 in the middle and one at each end of the
skirt. Each chassis hole was slathered with silicone adhesive sealant to guard against corrosion. I used foam tape on the
skirt to ensure the skirt would not vibrate and to provide a better interface between the skirt and the chassis.
I used Stainless Steel #12 sheetmetal screws in the holes I drilled with #12 SS finishing washers to ensure I wouldn't
crack the Carbon Fiber when tightening down on the screws.

 Putty denoting where to drill holes in the skirt. Foam tape on the skirt. Note also the drilled holes pattern.
With the skirts now mounted I was wondering what to do about the mudguards and the rear rock deflectors.
The mudguards were not going to fit. I had resigned myself to this conclusion prior to the purchase but the rock deflectors concerned
me. Their complete removal would leave the inner fender leading chassis edge exposed to the pounding of
road debris from the rear tire. I didn't like this idea. Hmmm... I wonder if the rock deflectors will still fit as they were
after all mostly located "under" the car. Sure enough just a wee bit 'O trimming and they can be made
to fit with the sideskirts unaltered. A Dremel and a cutoff wheel work wonders with plastic trim parts BTW,
partially cutting and partially melting it's way through the plastic leaving a nice clean cut.
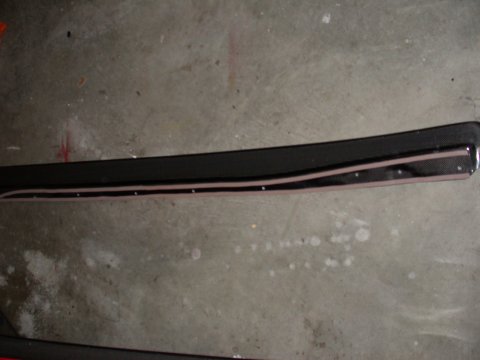
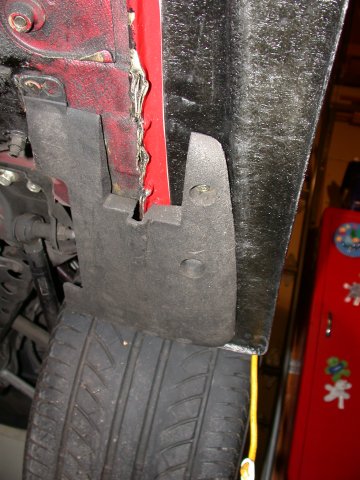 SS mounting hardware down the length of the sideskirt.
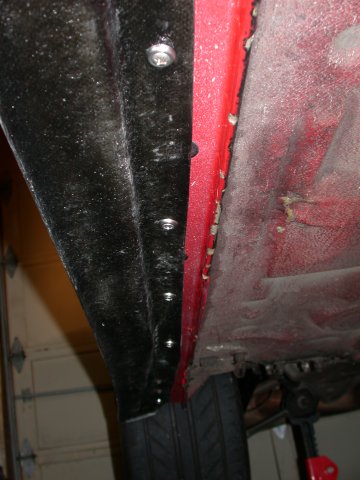
Retrofitted rear rock deflector. (ewww! Mangled chassis sill seam.)
SS mounting hardware down the length of the sideskirt.
Retrofitted rear rock deflector. (ewww! Mangled chassis sill seam.)
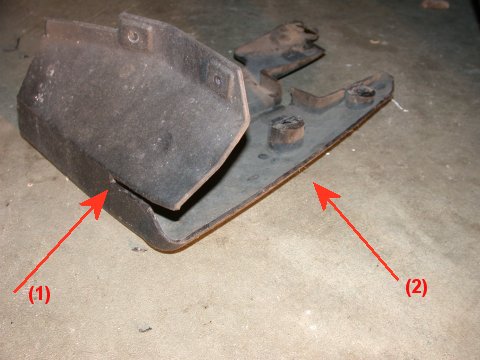 Virtually unmodified deflector. Notch is elongated (1)
and a pie slice of plastic was taken from the lower outer edge (2).
Virtually unmodified deflector. Notch is elongated (1)
and a pie slice of plastic was taken from the lower outer edge (2).
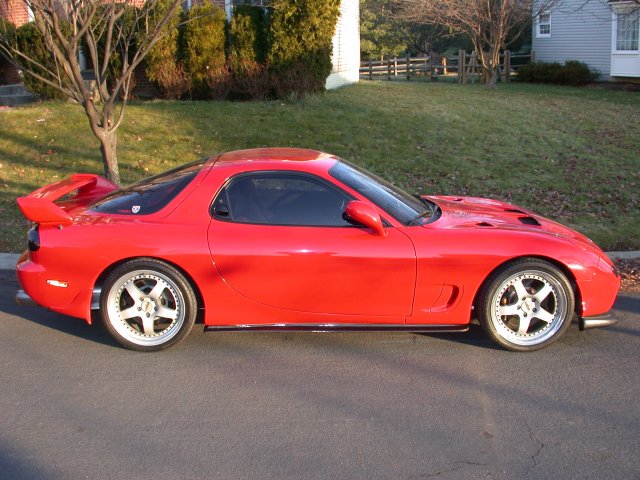
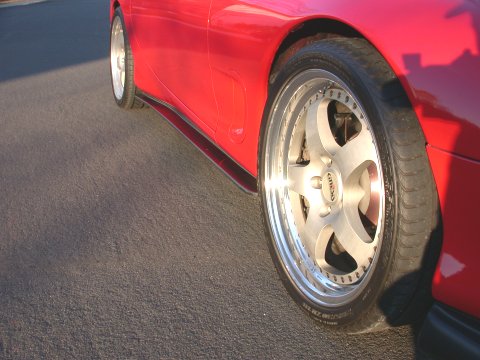
THE FINSIHED LOOK
Not too bad. The Carbon Fiber looks really neat but I had hoped for a slightly deeper skirt.
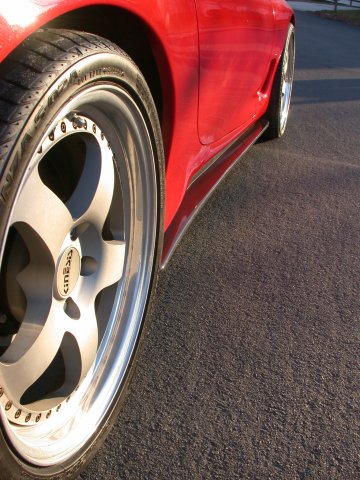
These look more like a thin blade. I have concerns about the leading edge of the skirt directly behind the front wheel.
The wide 285 width front tires stick way far out from the wheel well and are sure to pelt the skirt with debris.
Possibly some helicopter tape along the leading edge or a liberal layering of electrical tape will do the trick.
I'll have to think about this one. On the plus side the width of the skirt will no doubt protect the side of the car from
errant stones and track rubber.
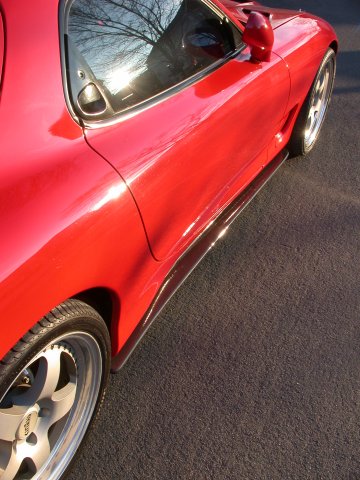
 The mirror is up as I'd just rolled the car out of "storage" and hadn't
flipped it down for the pics...silly me.
The mirror is up as I'd just rolled the car out of "storage" and hadn't
flipped it down for the pics...silly me.
TRIPLE-R
MAIN PAGE
GENERAL
OVERVIEW | THE
HEART OF THE BEAST | STOPPING
AND TURNING | THE
COMFORT ZONE
7-UP CLUB
MAIN
OUR "LOCAL7"
COMMUNITY | THE
WORLD OF THE RX-7
This page last updated December 30, 2005
If you would like to contact me and converse about my experiences with
my 7:  please feel
free to send an e-mail to crispyrx7@yahoo.com
please feel
free to send an e-mail to crispyrx7@yahoo.com
Disclaimer: All images contained on this page are
the sole property of C. Regan or were collected from the public domain,
unless otherwise indicated. If any image contained on this page is considered
private property. Please contact Christopher
Regan.