

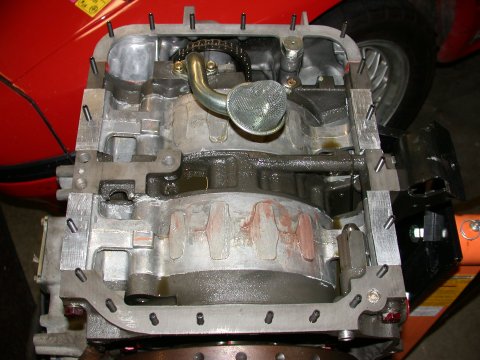
Now that most of the topside work has been taken care of it’s time to spin the
motor over and deal with the oil pan “upgrades.” It is a shame to have to break the seal
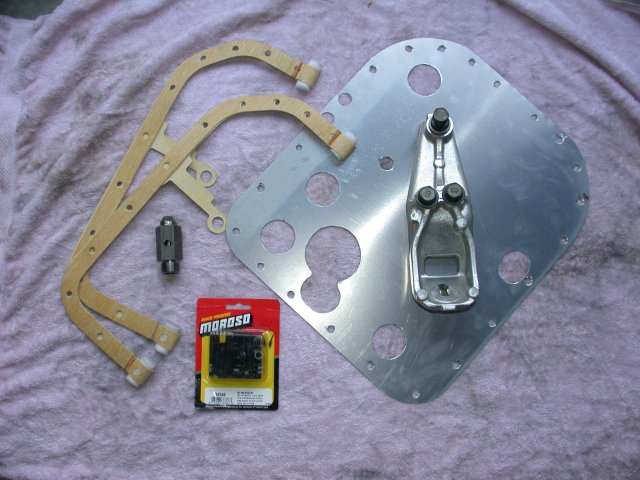
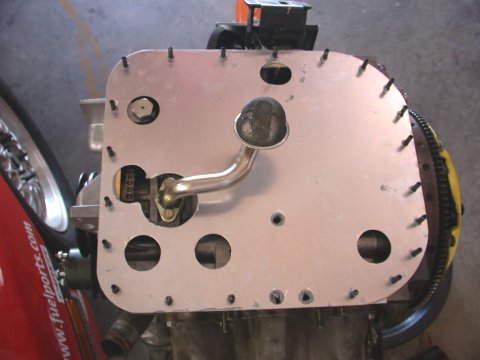
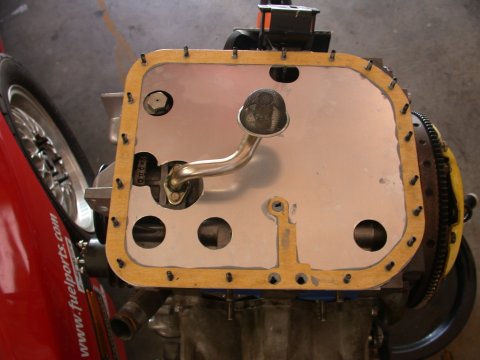
on the reman’s oil pan but ya gotta do what you gotta do. The oil pan baffle plate is one
of my own fabrication ($5 in raw material and about an hour to make) but I did use the RB
design as a template. IMAGE
The baffle plate should help with oil slosh issues in hard cornering and to de-aerate the
oil. Since the baffle plate and extra gasket add thickness to the “sandwich” the stock oil
pan bolts are a little too short to reuse. Since it is difficult getting the baffle plate
and two gaskets (bought cheap off the forum for $5 each, they are about $15 - $20 each new)
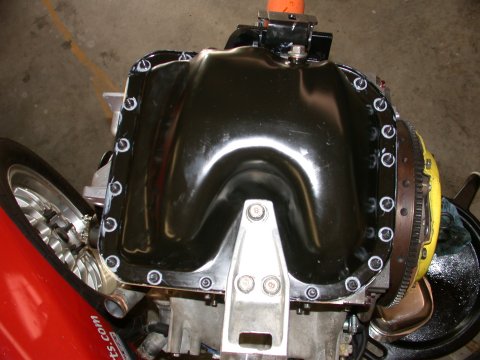
all lined up it is advisable to replace the bolts with studs and nuts. Moroso sells a nice
set of studs and nuts (M6 x 1.00 x 35mm) specifically designed for imports, Mazda included,
(part #38366) The set of 22studs and nuts is about $20 from either Summit Racing or Jegs.
The studs also eliminate the worries over stripping out the aluminum threads in the housings.
The studs have an Allen Head socket at one end to facilitate installation. Nice. Also when
it’s all apart I replaced the rear oil pressure regulator. When running dual oil coolers,
which drop oil pressure, and more importantly when running the car at higher rpms it is
necessary that higher oil pressure be used to ensure adequate oil flow to all the internal
bearing surfaces. Now if only my engine had the race bearings with the deeper oil grooves.
The stock oil pressure regulator bypasses pressure at 60-70psi. Mazda sells a
race regulator
that bypasses system pressure at 105 to 115 psi but it’s expensive at $90. As an alternative
one can use the stock FD rear oil pressure regulator which bypasses system pressure at 90 to 105
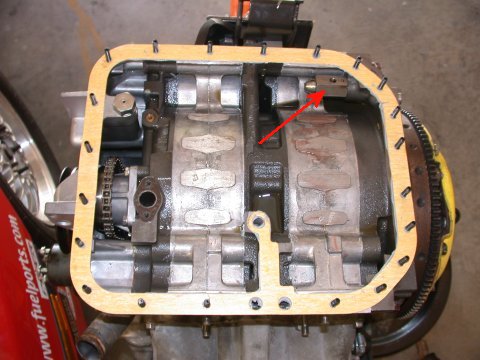
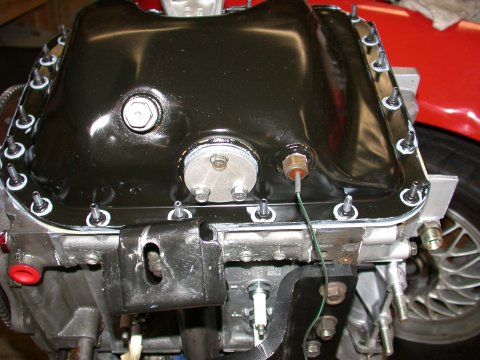
psi and only costs about $20 - $30 new. This is what I chose to use. I also removed the oil level
sensor and capped the opening in the side of the pan with a blockoff plate I made. So long as I’m
seeing oil pressure on the gauge, there really shouldn’t be a need for oil *level* indication also.
The demise of my motor can most likely be attributed to extremely high oil temperatures combined
with a possibility of low oil pressure during hard cornering. I’ve seen on occasion oil temps at around
250degF in the summer of ‘05 and although I didn’t see overly high oil temps at the spring 06 SCCA school
they were hovering in the high 220's which doesn’t preclude the fact that they were higher than that at
some point in time. The solution is to build in more oil cooling capacity and better duct airflow to them.
The stock 2G oil cooler is as good as them come from the manufacturer. It is large and thick and ironically
better than what is in the 3G RX7. But it still wasn't enough. So another cooler needs to be added.
The most cost effective solution is to simply add another one of the stock oil coolers to the system.
The problem then being how to plumb the second cooler and where to place it so both coolers get enough airflow.
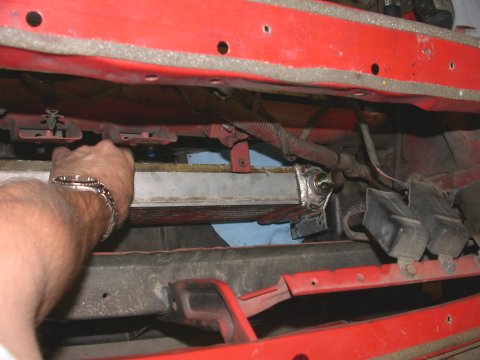
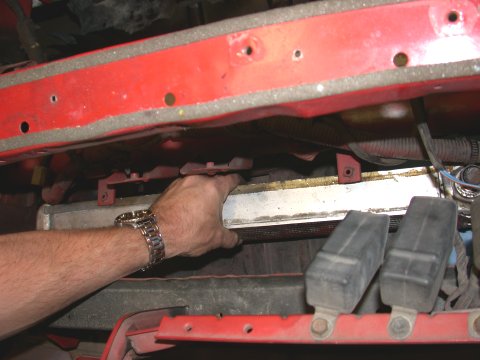
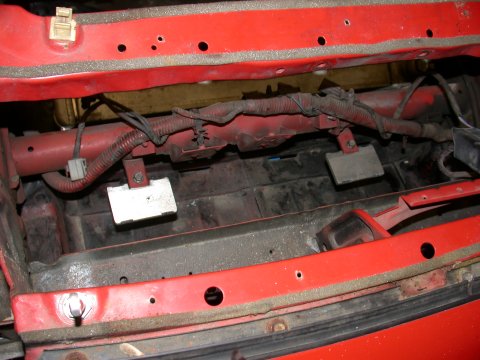
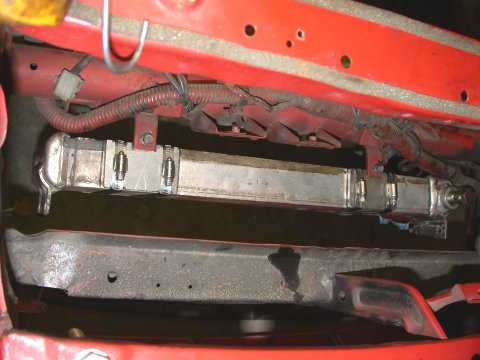
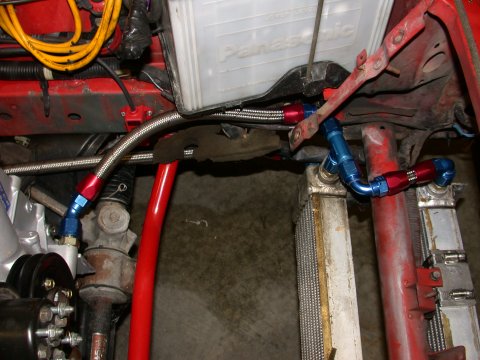
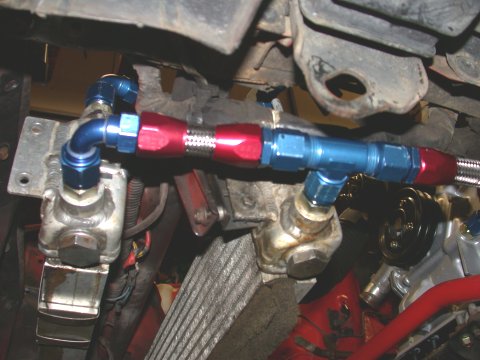
I chose to hang the second cooler in front of the OEM placement and to plumb the two coolers in parallel
(instead of in series). The parallel is the preferred setup to maximize cooling efficiency.
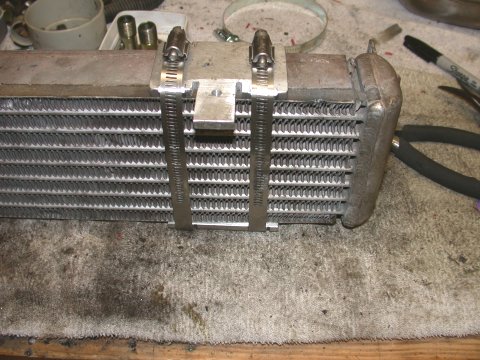
To mount the second cooler I simply used two existing hanger brackets on the front cross tube
and fabricated some aluminum brackets to stiffen the cooler and protect it from the clamps. The clamps
being generic large diameter screw type hose clamps. Simple and effective.
The cooler sits nice and low to avoid blocking too much airflow to the radiator but yet placed well enough
to get a good deal of airflow from the nose opening.

Since in racing the car is typically run at 10/10ths the whole time there really isn’t a
real need for oil temperature control. You simply want all the cooling you can get with minimal
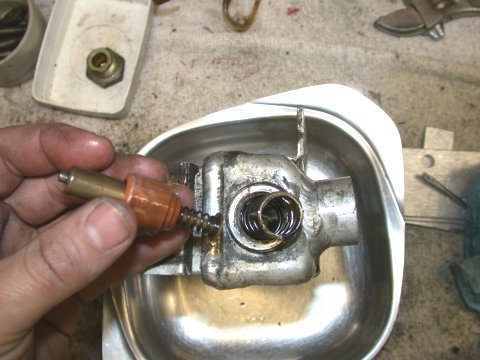
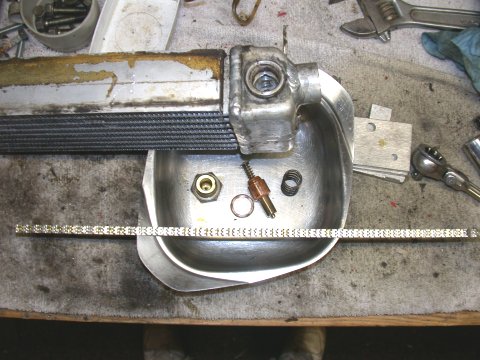
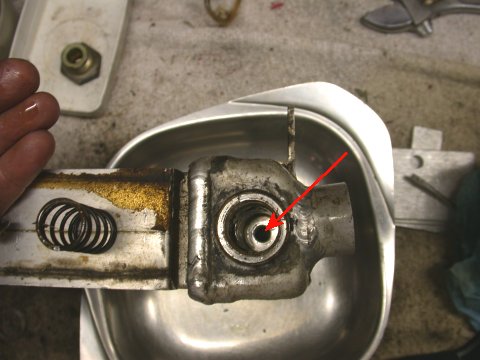
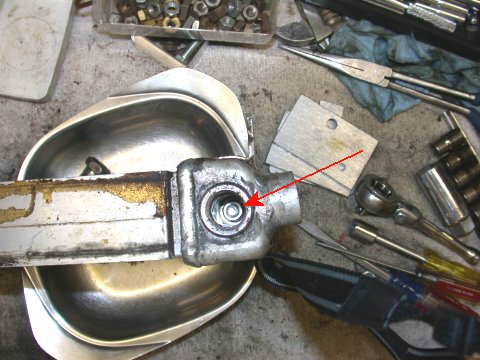
restriction in the system and fewer components to fail. So I removed the thermostats from both
oil coolers and plugged the bypass holes with a bolt and locknut (use a locknut - you don’t want
the bolt falling out of the hole and letting oil completely bypass the cooler!). It’s tricky getting
the bolt and nut in there and takes some dexterity with the tools...and the right tools....the right
*small* tools.
With the coolers mounted next was to plumb the lines. Unfortunately the SS oil cooler lines
I had been using will no longer work as they were designed to use the OEM style banjo bolt fittings.
With the two coolers running in parallel the banjo bolts won’t work. Since this is the case you are
pretty much resigned to convert everything to -AN fittings. This is where things get expensive.
This is not for the faint of heart and fitting dual oil coolers should only be done if you are REALLY
serious about racing or have significant oil cooling problems. To plumb the two coolers in parallel
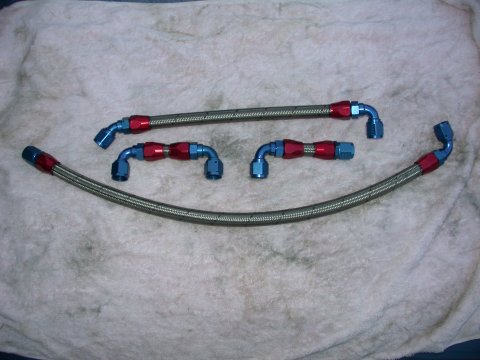
the lines are run from the front cover to the first cooler fitted with a “T” then a short line from
the “T” to the second cooler. The an identical set of lines, cooler to “T” to engine, is run back
to the rear iron.
Graphic of what I envisioned. This is what you will need and how much you will spend...ya better sit down:
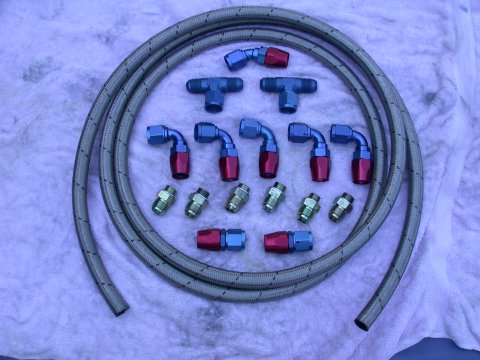
All the fittings are AN fittings and lines are -10 size.
From Mazdatrix I ordered:
Five AN-10 to 16mm THD adaptors (4 for the oil coolers and 1 for the rear engine housing)
Part # 11901 $9.50 per fitting = $28.50
One AN -10 to 18mm THD adaptor (for the engine front cover)
Part # 11902 $9.50 per fitting =$9.50 PN#11902
Five Sealing washers Part # 41-6000-9956 $1.25 per fitting=$3.75
One Sealing washer Part # 41-6000-9956 $1.25 per fitting=$1.25
Mazdatrix (including shipping) Total: $81.65
From Earls I ordered (this site had everything else I needed in one place. You might find the pieces cheaper elsewhere but shipping from several different sources vs just one will eat up your savings)
One 45 degree AN-10 swivel seal hose end fitting Part # 804610 $23.35 per fitting = $23.35
Five 90 degree AN-10 swivel seal hose end fitting. Part # 809110 $23.35 per fitting = $116.75
Two straight end AN-10 swivel seal hose end fitting Part # 800110 $10.25 per fitting = $20.50
Two T AN-10 female swivel on side fitting Part # 925110 $31.32 per fitting = $62.64
10 Feet -10 hose (10ft bulk ) = $68.00(?) Part # 3270-10 (10 feet is more than I needed but it was cheaper to buy the 10ft bulk length than buy individually by the foot for the 7.5 feet I calculated I needed)
Earls Total: $291.14
Total parts only not including shipping: $372.00 CHEEEOOOOWWW! Thankfully I had a used 2G oil
cooler in my stockpile that I got from somewhere for nothing. Some of this I will recoup from sale
of the SS lines I already had and from the sale of the stock oil cooler lines I had with my spare
cooler so the hit won’t be too bad but it is still HELLA expensive to do this setup.
There might be a concern regarding airflow to the coolers, that being that the new second
cooler will just block airflow to the stock location cooler. Maybe so. But the second cooler will get the full
effect of air from the nose and a opening up the undertray in the area between the two coolers cna be used to
direct airflow to the stock (rear) cooler. And all of this is done without blocking any more airflow to the
radiator beyond what the stock cooler would have done by itself.
7-UP CLUB
MAIN
OUR "LOCAL7"
COMMUNITY | THE
WORLD OF THE RX-7
This page last updated June 10, 2006