

Poor Rusty was sitting so lonely on his trailer under a cover that I decided to roll him off
the trailer and tackle some of those items from my LONG to-do list from the end of last year. See bottom of
previous page - Page 22: Rusty Racing
There were so many I didnít know where to begin but some of the MUST-DO'S were calling my name.
So after starting a grumpy and smokey Rusty he was rolled off the trailer and into the garage for some TLC.
First up the slotted brake rotors. Not legal for ITS so they had to go. Being cheap
I sourced a set of 4 (front and rears) new plain (no slots or x drilling) rotors (Chinese no doubt)
off eBay for $120 shipped. Deal. My old slotted fronts I sold for $50. The slotted rears were trashed
due to sticking caliper sliders - one side looked new, the other was wafer thin. I rebuilt the rear
calipers last year. While the front rotors were off I checked and repacked the front wheel bearings.
I also removed the stock backing plates/dust shields that were still on the car. I will eventually
run some dedicated brake ducts from the nose to the rotors but to much other stuff to do right now.
I also checked and brake pads and installed some new - used Hawk Blue pads from my FD which still
have about 1/2 thickness of pad material left. Should be good enough for the upcoming SCCA school.
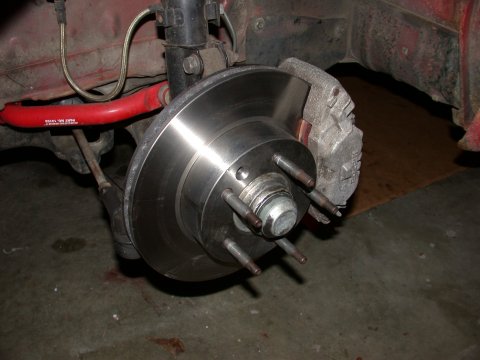
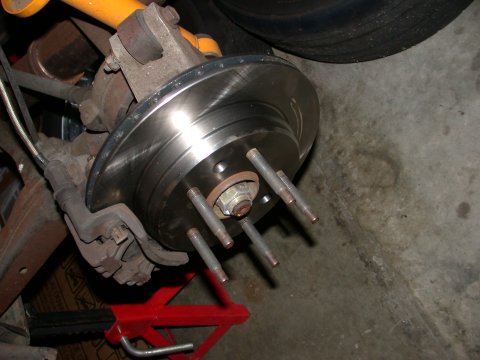
Yup...thems new rotors all right!
Ok now for the good stuff. As I found out very early on driving a stripped FC on the track, there is
a tendency to lock up the rear brakes rather easily. Too much rear brake bias, bad. Some folks
deal with this by playing with brake pad compounds but I didnít really fancy the idea. I prefered
installation of an adjustable brake bias controller (proportioning valve) to reduce brake pressure
to the rear brakes and thereby eliminating the rear brake bias. In other words Iíd rather lock up
the fronts and go straight than lock up the rears and spin off into oblivion.
Two kinds of adjuster, dial and lever. I chose a Wilwood lever type adjuster
(Part# 260-2400 - about $75) after hearing stories of the non-linearity of the dial type adjusters.
I also decided to put the adjuster in the cockpit so I would have the option of changing bias when
faced with a wet track vs a dry track. Whether or not I actually change the bias or not remains to be seen.
The other option was to mount the adjuster in the engine bay with a mind to ďset it and forget it.Ē
What fun is that?
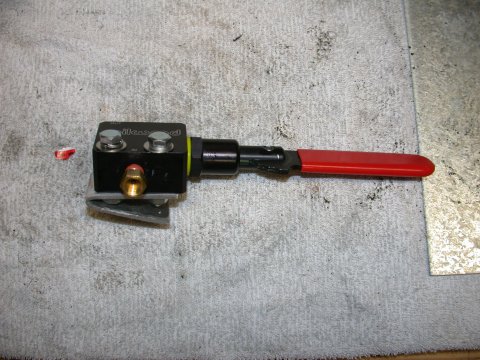
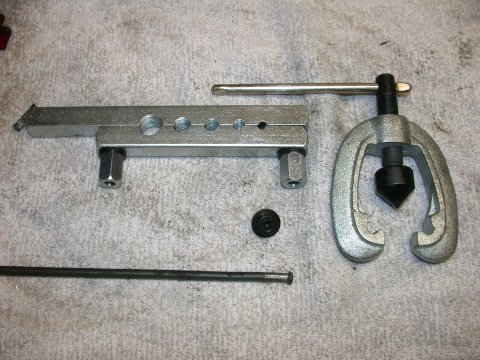
So, the adjuster has to be placed within easy reach of a strapped in driver - pax side of the
tranny tunnel would do. The single rear brake line runs along the drivers side frame rail under
the car. In short, the single rear brake line is cut and new lines are run from the upstream side
of the cut up and into the cockpit to the adjuster and then back to the downstream side of the
cut...and on to the rear brakes. Simple. Oh and to do this you have to drop the transmission.
Well since I had to replace the clutch anyways, no better time than the present.
On with the show, exhaust presilencer removed, driveshaft removed, and transmission (starter too!)
removed one has clear access to the underside of the transmission tunnel. I marked the spot for the
adjuster and quickly fabricated a small bracket to keep the adjuster upright (aluminum bracket pictured above
attached to the back of the adjsuter body). Drilled a couple of holes for the bracket and loosely
bolted it in place. Next I drilled holes in the tunnel for the upstream and downstream brake
lines. Be sure to leave enough room for a gentle bend of the brake line
and make the holes large enough to accommodate a rubber grommet to protect the brake line.
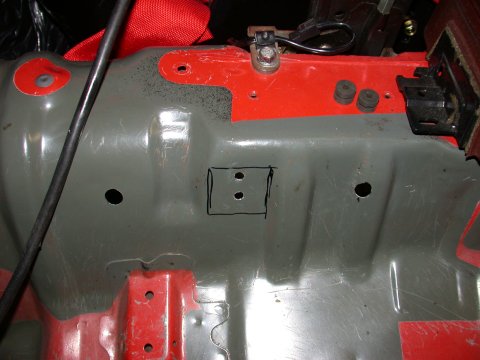
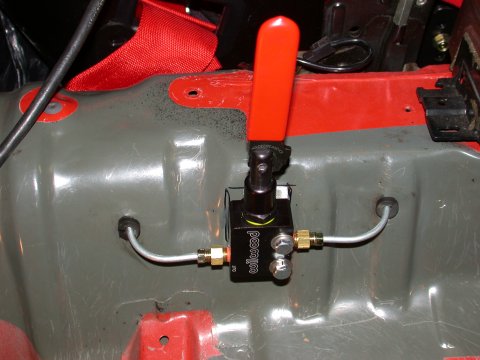
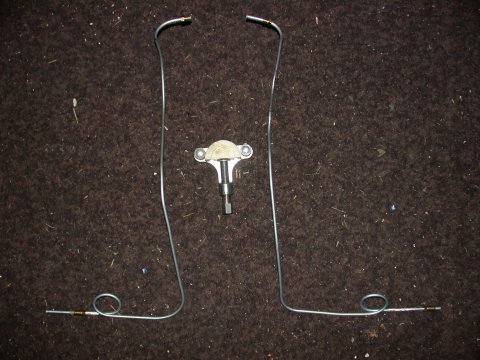
For brake lines I used 3/16" tube size precut and double flared lines with fittings already on the line
(Part# BL-340 from PepBoys). Carefully, one bend at a time and using a tube bender where possible,
I bent each line to run from the stock line next to the frame rail hugging the tranny tunnel, so it
wouldnít rub the tranny, through the tranny tunnel, to the adjuster and back. It is possible to bend the
lines by hand but the risk of kinking the lines is high so I used the tubing bender as much
as possible. Obviously one needs to make two lines. The loops in the lines serve two purposes,
to shorten then line and inhibit line vibration.
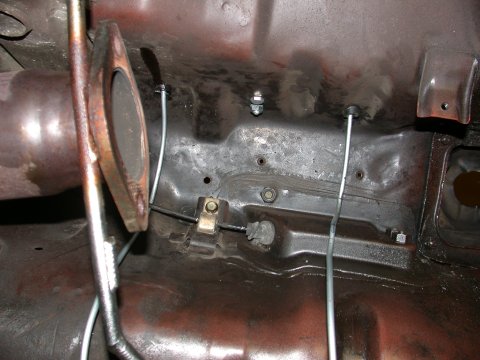
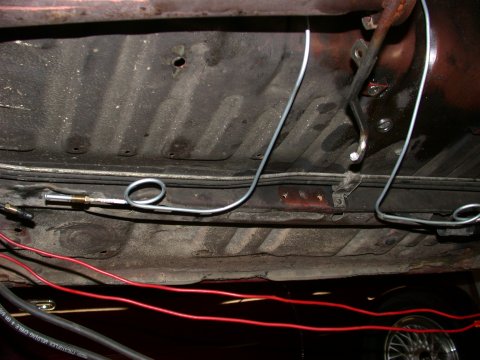
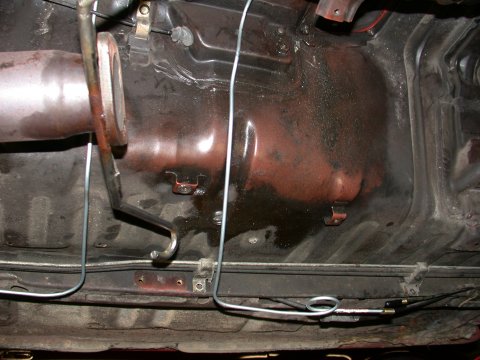
Now came the hard part. Having two small rubber caps in hand, I cut the rear
brake line under the car (using a mini tube cutter) and quickly stuck the rubber caps on them to stop all the brake fluid leaking out
and emptying the master cylinder. I made sure the cuts I made were in a location NOT near the plastic fuel and brake line chassis hanger
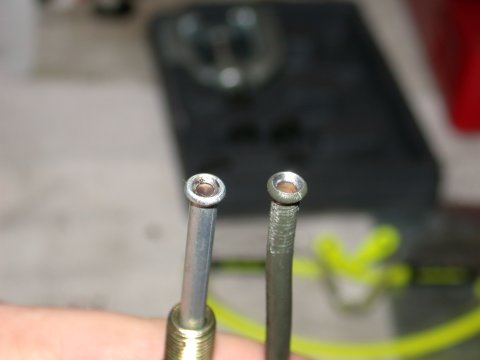
clips. The hard part was no going to be double flaring the stock lines,
while still on the car, and which were still full of brake fluid! It is of UTMOST importance that the line ends be DOUBLE flared.
A single flared tube end is a failure waiting to happen. After practicing several times on the length of
brake line I had cut from under the car I took a crack at the brake lines on the car. Be sure to put
the brass flares (3/16" flares, Part# 43469 - the stock line is actually a metric line but the
3/16" fit fine) on the line BEFORE you flare the ends, or else you will be cutting the line and doing
it all over again. Both seemed to have worked out just fine although I will say that the stock brake
line tube wall was much thicker than the aftermarket brake lines I bought.
Now with brake fluid having run down your arms and into your armpits you can bolt up all the brake line connectors.
Part number for the brass couplers connecting the flares was 43375. I used some
small line clamps to hold the lines in place and to minimize vibration and chafing of the lines against
the chassis.
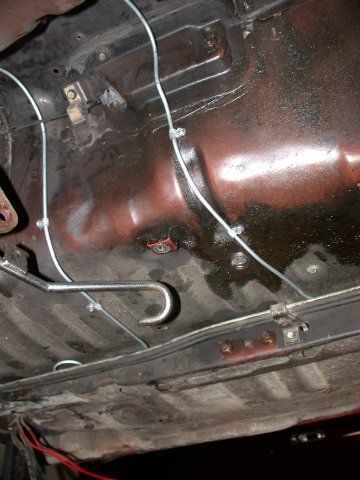
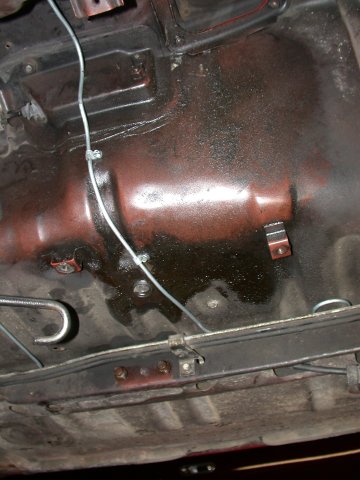
With everything bolted up and all the fittings snugged down I completely flushed and bled
the system. Since the adjuster is pretty high in the system if you have a pressure bleeder Iíd suggest
using it or you can be like me and spend an hour bleeding the brakes. The final test of course is to
clean all the brake line couplers thoroughly get in the car and STAND on the brakes with every ounce of
your might for a few seconds. Then jump out of the car frantically and peer under the car for the
steady stream of brake fluid from the brass brake line coupler you installed that has just stripped.
Ok, not really, but it is a tense moment. I think it goes without saying that the line connections
should be checked regularly for any signs of leaks until you can be sure that the system is sound.
A drop in brake fluid is also a sign of something amiss if itís a slow leak. Lets hope it works out
well on the track.
SUMMARY OF PARTS NEEDED:
Wilwood adjustable brake proportioning valve (PN 260-2400 from Summit Racing) $75.00
Two 3/16" precut/preflared brake lines with fittings - don't recall the lengths, somehwere between 24" and 36" (PN BL-340 from PepBoys) $8.36
Two 3/16" brass flare fittings (PN 43469) and two 3/16" Brass flare couplers (PN 43375) $7.96
1 liter(? - the big bottle) Valvoline synthetic brake fluid $5.99
......Might as well upgrade the clutch. After last falls racing school I felt the clutch
was overheating and beginning to slip the longer I drove the car. That slight bit of slip after
each shift was annoying and indicative of potential early failure if I continued to use it.
Either that or Iím a club-footed when I shift and riding the clutch. I was a little ticked
because the Exedy clutch I had in the car was brand new with only a few track days on it.
The disc material simply was just not up to the task of racing. Lets get serious. After
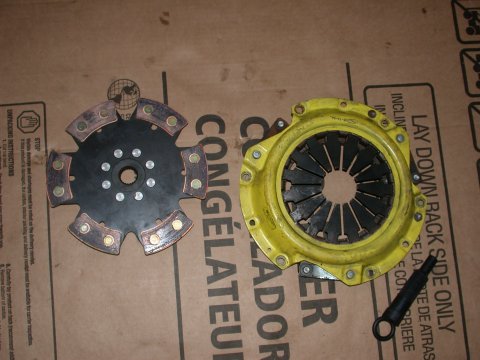
scouring the internet I found a used ACT pressure plate with a copper 6 puck unsprung clutch
disc for $160. Jeez I hope this thing doesnít shatter my transmission the first time I shift it!
There are some worries about copper puck clutch discs tearing up flywheels, well if it does
so be it. The cost of racing, besides I have a spare flywheel.
With the transmission out of the car swapping in the new clutch was easy. While I was in there
I checked the throwout bearing and regreased the pilot bearing (new when I installed the Exedy
clutch) while everything was apart and installed the new - used ACT clutch. Oh this is going
to be fun. Fast forward a few weeks and after driving the car itís not nearly as bad as I thought
it would be. Yes, when it grips it grips but I think given the racing environment this is going
to be a good thing to have.
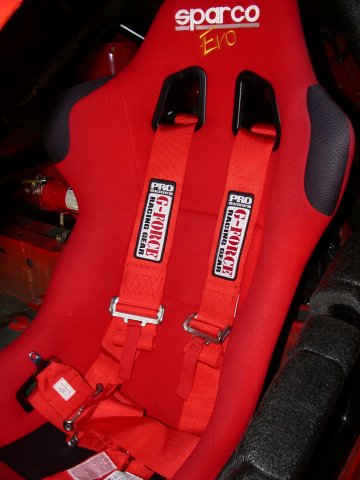
First up my harnesses. Regulations limit harness age to 2 years or 5 years. Seems my
essentially brand new Sparco harnesses I used for barely a year were out of date. Dang it!
New harnesses were purchased, except this time I wasnít going to be so naive and I bought FIA
certified harnesses which are valid for 5 years so I won't have to keep throwing away money.
A nice set of G-Force 6 point harnesses which, dare I say it, I like better than the Sparcoís!
Next I replaced a broken battery tray - a $20 (shipped) used tray with a new hold down to
replace the rusty one I had. All the fluids were changed - engine, tranny, diff, and with
new filters. I checked all the suspension bushings and all looked fine.

Keep going for more and a summary of the costs for these "improvements" and maintenance items and what I have left
7-UP CLUB
MAIN
OUR "LOCAL7"
COMMUNITY | THE
WORLD OF THE RX-7
This page last updated March 8, 2006