

After a hiatus from working on the old rustbucket, I decided that it was time to finish things up before the weather got too cold. Plus I needed to free up some space in the garage for new incoming parts for the FD. So RC was rolled off the trailer and these last few items were taken care of...before it was rolled back on the trailer. Now if I could only get out on the track with it!
| After so much work the car was at least driveable up to this point. But there was much left to be done. Lets start with some wheels. The car was being rolled around on some well aged street tires complete with dry rot. Yeah they worked but for a track car, I'd be afraid to even roll into the first corner with them for fear the cracked tires would simply disintergate under the load. Well as may have been noted earlier I happened upon a set of used track tires...well used track tires I might add. Yeah they had "some" tread left...maybe enough for a single track day but one can't say no to something for free! The kicker was they were not even in the right size at that. But they would fit on my existing OE rims and they were better than the existing crapola on the car....at the time. So I took them and had a friend mount them to the stock wheels. Being a 205/40-15 tire they do look funny but talk about some gearing. This same friend paced me on the freeway and with my speedo zinging along at 80mph while I was actually only doing about 65! Of course this also includes the 4:30 rear end. With the undersized donuts the car was, to say the least, VERY peppy and would make a hell of an autoX car. No doubt on a short track a killer exiting corners. Still there was a need for more "real" tires. I had been monitoring eBay for a set of decent track wheels and IMO the best option, and most commonly used wheel was the Kosei K1's in 15x7 size. Durable and inexpensive and only 13.5lbs with 38mm offset for an FC, seemed to be the option. $129 a wheel new from Tirerack. Even new $500 for 4 rims is a steal (compared to the $4000 set on my FD). Available in 4 or 5 lug. This was the direction I was heading until I stumbled upon a local who was parting with a set of FC convertable BBS rims shod with barely used (1 track weekend) Toyo Proxes RA1's in 225/50-15 size. And all for the low low price of only $400 tirees included. How could I pass this up. The BBS convertable wheels although only 15x6 1/2 still manage the 225 tire with no issues and weigh in at under 12lbs each which is amazing. So they aren't too pretty to look, for a race car who cares, at least they were straight. A steal...so I bought them! Now there is a real bummer about this whole wheel question as the wheels spacers I have to use my OEM FD rims for street pimp duty (see: Part 11) no longer fit because of the 3" wheel studs...well nuts! | 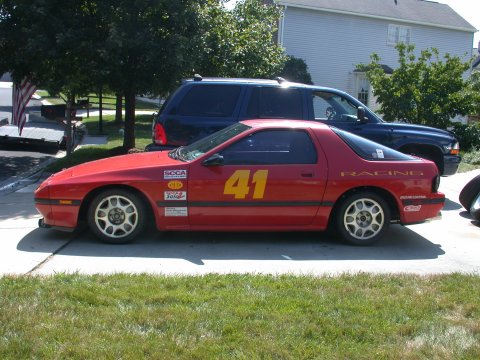 Looks like a lowrider don't it?
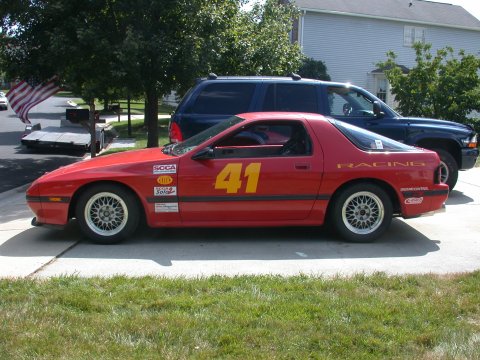 Ah...better. Ride height still yet to be set.
 |
|---|
Now RC came with no door panels. Undoubtedly to fit the roll cage. No sweat. ITS rules mandate either the stock door panels or an aluminum door panel unless the door had been cut to accommodate a NASCAR style door bar. Not in my car so given I did not have the original panels, nor did I feel like sourcing a set of OE panels, nor would they even fit if I could, therefore, I had to make some panels. Piece of cake. Order some of the cheapest 0.063" AL sheet from burnsstainless.com (T5052 AL 20"x48" 2 pieces $70.97 including shipping) and have at it with a rotozip and a cut off wheel. Easy right? Well I did first make a template out of a big peice of cardboard to ensure it was the right shape. Template was traced onto big sheet 'O aluminum and cut away, hoping that you haven't just buggered up a $35 peice of aluminum and wasted a week while you wait for another sheet to be shipped to you. With the panel cut I drilled some holes and used sheet metal screws to fasten the door panel in place. Sheet metal screws why not pop rivets? Well knowing me I will have to remove the panel for some reason sooner or later and didn't relish the idea of drilling out (aka spinning rivet in the hole for hours) the pop rivets simply to remove the panel..then having to re-rivet it back in place when done. All I need is a screwdriver. And behold below the finished product. Oh yeah and yes you do have to open the doors to wind up the windows. Only some minor bending of the door lock linkage was required. Makes unlocking the doors a bit stiff but it still works.
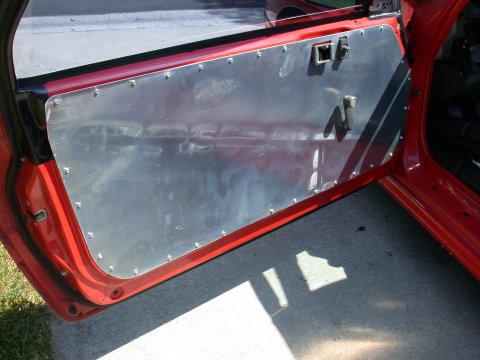
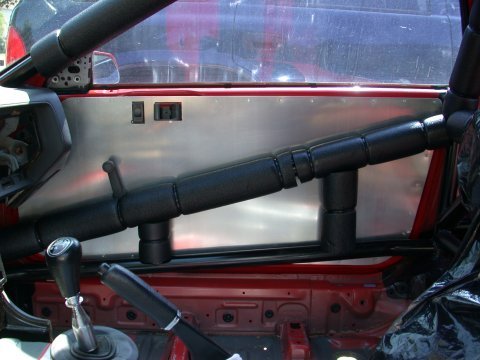
Believe it or not some of my local friends were giving me crap for not polishing the panels. I wonder why?
Not much to talk about here. When I bought the car it came with a SpeedSource (I think?) fiberglass lip spoiler. It was taking up space in the garage so I installed it. A royal PITA to install as over time the lip had become warped. Add to this the somewhat battered front bumper cover and there was much cursing and swearing going on during the install. Someday I will remove it and install it a little better and also drop the leading edge of the undertray to take advantage of the center scoop in the lip spoiler whcih rigtht now isn't doing a whole lot of anything. Overall it does make the car look a little bit more speed worthy though.
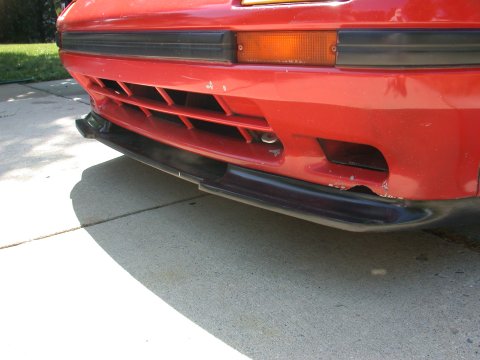
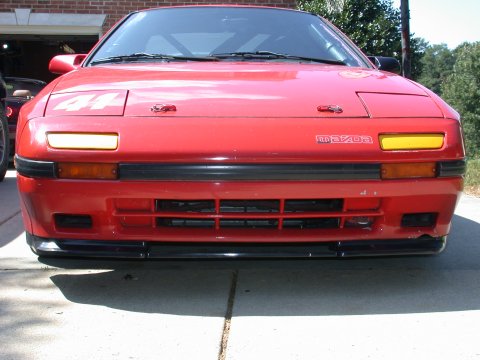
Speedsource front lip
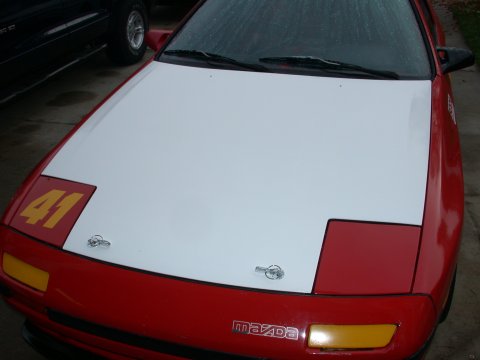
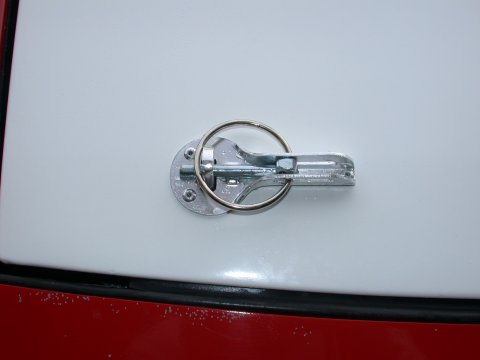
Freshly painted WHITE Aluminum hood with new APC hood pins.(right)
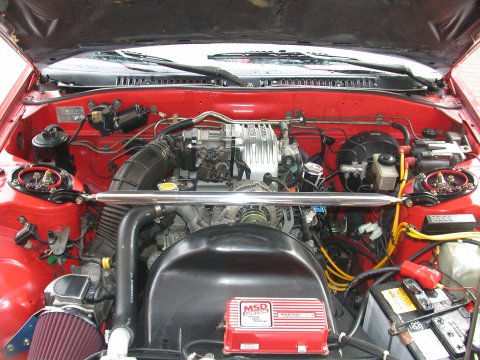

$12.99 eBay strut bar. Note VERY tight clearence to the phillips head screw on the front of the alternator.
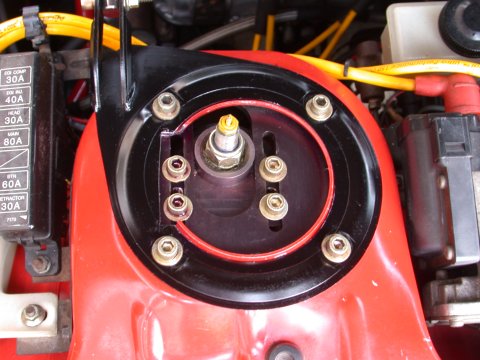
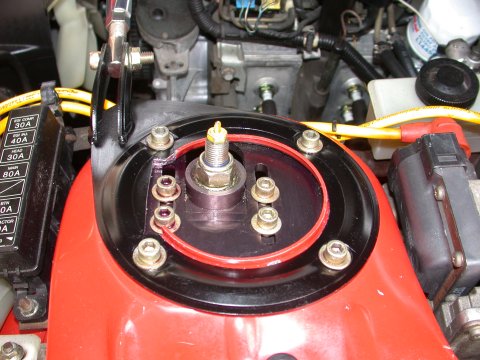
Shown are the cuts in the strut tower and strut bar needed to allow for camber adjustment.
So what's left you may ask? Well here's what I would like to eventually do: install FD fuel pump, I need to replace the now nonfunctional outside review mirrors (both were broken), install a Wink inside rear view mirror, disable the steering wheel lock, install a new (used) dash (this one is hacked to beyond ITS rules, have window net brackets installed and hang net, remove 5/6th port sleeves (I wish I'd known I could have done this when I had the engine out of the car), possibly fabricate dual oil cooler setup (twin Series OE coolers, I have the parts!), install Wilwood adjustable brake proportioning valve (sitting on my workbench), some Mazda emblems (I know...so vain), new brake rotors/junkyard takeoffs (slotted jobbies now on the car aren't legal plus I need spares), an underdrive pulley would be nice, a shift light, and I need some timing gear. Other than that the car can be driven as-is until I decide to go racing...for last place! Until then, see you on the track.
7-UP CLUB
MAIN
OUR "LOCAL7"
COMMUNITY | THE
WORLD OF THE RX-7
This page last updated November 26, 2004