
PART 16: A HEART AND SOUL FOR RC
The Racecar Gets an Engine...FINALLY!
Progress on RC continues. In case I haven't mentioned it RC is my nickname for the
racecar...RC...RaceCar..get it? The great dilemma regarding an engine for RC was solved one
afternoon after spotting a DC local selling a complete S4 drive-train from a 1988
convertible he was having converted to a TII drive-train. The price was right so I
bought the long-block engine and transmission, the ECU, and a badly needed differential
mount. I had thought I needed the ECU as the N327 ECU for the ‘86 (which I had)
fed into a wiring harness that used an fuel injector ballast resistor, the harness for
my '88 motor did not use the resistor. The difference being the use of
low impedance verses high impedence fuel injectors. Being the conservative gent I am
I bought the N338 ECU as part of the package...just in case. Well, turns out
I didn't need to the N338 ECU after all (Thanks a lot *Dale Clarke* for pointing out my
ignorance! Thanks a bunch [VBG])- but at least now I have a spare. Apparently
all FC ECU's are designed for high impedance injectors. On cars with low
impedance injectors, there's a resistor block in the wiring harness that
bumps up the total resistance the ECU sees. The only known differences between the
various ECU's (N326, N327, and the 'vert ECU - N338) are minor emissions tweaks.
The N326 and N327's don't have any differences except emissions related changes.
The fuel and ignition maps are identical however. But back to my new drivetrain,
for the $375 it cost me I had a 120,000 mile motor with good compression,
complete with both power and ECU wiring harnesses, all emissions control components
in place and all the brackets for the PS and AC. The tranny was also untouched and
came complete with a starter.
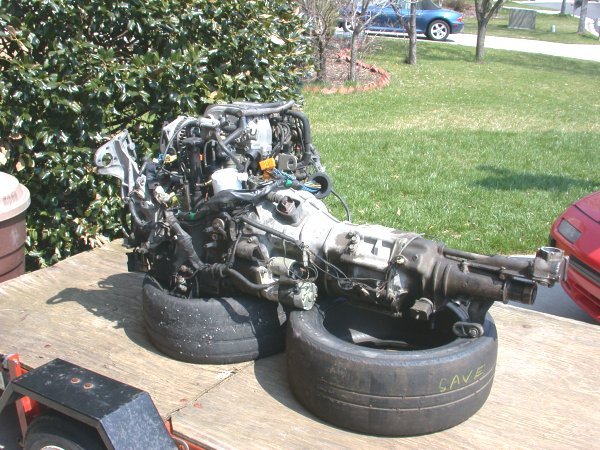
Towed home on the neighbors trailer now sat in my driveway RC's new engine ready for work
Engine A and Engine B
As always for me the first thing was to clean the 15 years of oil
goo and road grime from the engine and tranny. Makes working on it
easier and it looks nicer too. A few cans of engine degreaser and a
good hose-down (be sure to cover anything that won’t like getting wet -
exhaust ports, intake openings, oil fittings, etc) and next up was to
strip the “good” parts off of Rusty and swap them over to the motor for
RC. Working with the engines side by side I spent a day removing a part
from one and installing it on the other. I swapped all the “good” parts
from Rusty over to the motor for RC, i.e., EGR valve with blockoff plate,
ACV with blockoff plate, throttle body with modified throttle body, and the
new pulsation dampener. While I had the upper intake manifold off on the
motor for RC I replaced all the rubber fuel lines with new hose and did the
same for the coolant hoses - fresh hoses everywhere in other words - the same
as I did on Rusty. I also took the time to strip
down the motor of any unneeded components so
the AC/PS bracket was removed, air pump and bracket removed, extra pullies
removed, and the exhaust manifold removed. I then disconnected the power
wiring harness (battery to alternator to starter), basically the wiring
harness that runs down the drivers side of the motor, and separated the
tranny from the engine and installed a new clutch before dropping the
“new” engine into RC. The new clutch was a basic OEM replacement
clutch with an as advertised 10% more clamping force which should be
plenty for the just slightly more than stock power output of RC.
The EXEDY clutch package was an eBay special from Clutch City which
was comprised of a new pressure plate, clutch disc, throwout bearing,
pilot bearing and seal, and alignment tool (which I now have about 3
of) for $165.00 (+$18.00 shipping). It’s amazing how easy it is to
install a new clutch when the engine isn’t in the car! The tranny
itself will be saved for a spare. As for fitting the clutch and bearings
not much to it...provided you have the right tools. I have access to a
Mazda pilot bearing puller SST so that was no big deal and the rest are
merely bolts to R and R. I did not replace the rear main seal. Will
this come back to bite me later...time will tell but I really wasn’t of
the mind to try and remove the flywheel that day.
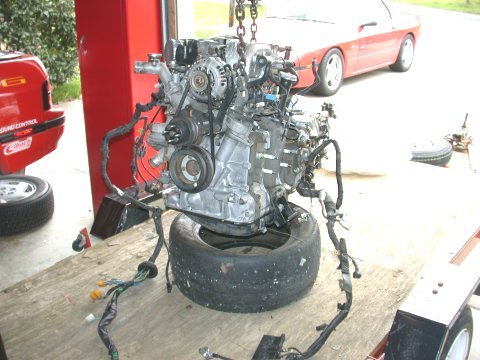
Almost looks like a new engine, no?
So with the engine stripped down to just what I needed for RC
and with a new clutch fitted and new throwour bearing installed
on the tranny input shaft, the new engine was dropped into RC and
and things could finally move forward. I won’t go into too much detail
on how to fit an engine into a car as there really isn’t much to say.
I borrowed an engine hoist from a friend for the work and fitted the
engine by myself without much effort. The first time I’ve done this BTW.
The only tricks I could recommend are to lift the front of the tranny a
bit with a floor jack and be sure the tranny input shaft is in the clutch
before trying to bolt the bell housing to the motor.
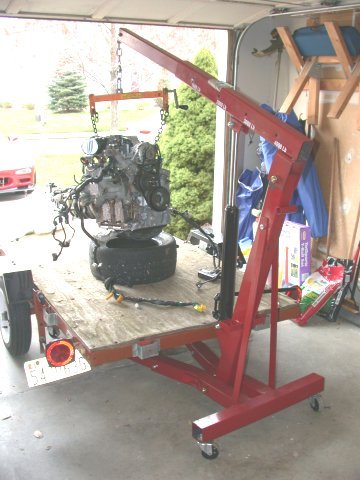
Lets begin: Step 1 - Lift Motor, Step 2 - Make sure engine bay is empty
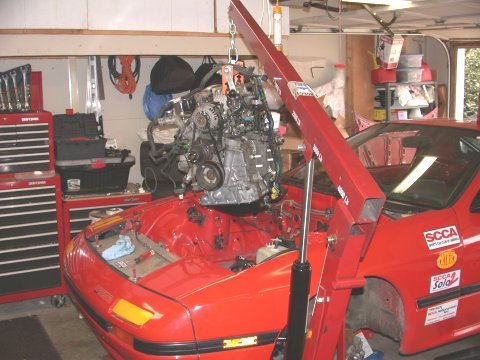
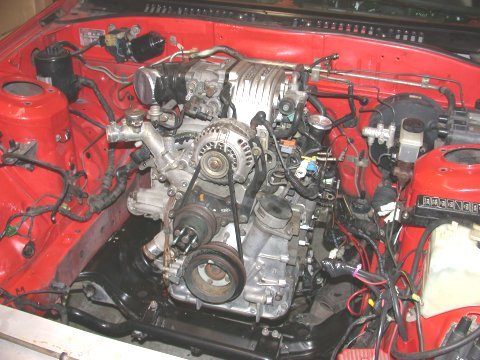
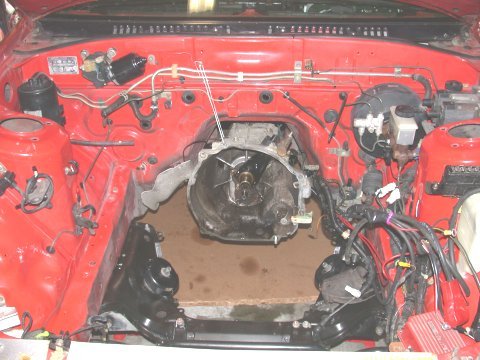
To continue: Step 3 - Hang motor over engine bay, Step 4 - Drop motor into place. Easy right?
With the motor now nestled into the bay, first up, the both power
(drivers side) and engine control (passenger side) wiring harnesses were
run and plugged in - the N338ECU being installed first of course. I
installed the new spark plug wires from Rusty and a good set of old spares were
used for Rusty. The intake from Rusty was swapped into RC and an old cone
filter intake was installed into Rusty. RC was finally beginning to take shape.
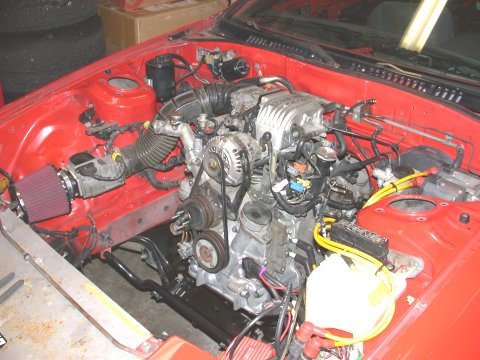
Progress - engine installed and wired up.
Hooptie
to Hotrod: Part 1
Scrap
Metal: Part 2
Cosmetic
Fluff: Part 3
Brake
Gravy: Part 4
Exhaust
Work: Part 5
Dieting
and Some Oil Cleanup: Part 6
Cooling
Hacks: Part 7
Underhood
Miscellaneous: Part 8
Interior
Gauges Plus: Part 9
Own
a Lincoln? Suspension Upgrades: Part 10
New
Shoes: Part 11
What's
Next: Part 12
A
Twist: Part 13
Sweatin'
to the Oldies: Part 14
More
Suspension Work: Part 15
Some
Heart and Soul: Part 16
Chapter
II: To Jump to the Next Series of Installments: Begins with Part 17 - A Good Rear End
BACK TO THE MAIN PAGES AND THE 3RD GENERATION RX-7 STUFF
7-UP CLUB
MAIN
OUR "LOCAL7"
COMMUNITY | THE
WORLD OF THE RX-7
If you would like to contact me and converse about my experiences
with my RX-7's:
please feel free to send an e-mail to crispyrx7@yahoo.com
This page last updated April 28, 2004
Disclaimer: All images contained on this page are
the sole property of C. Regan.


