

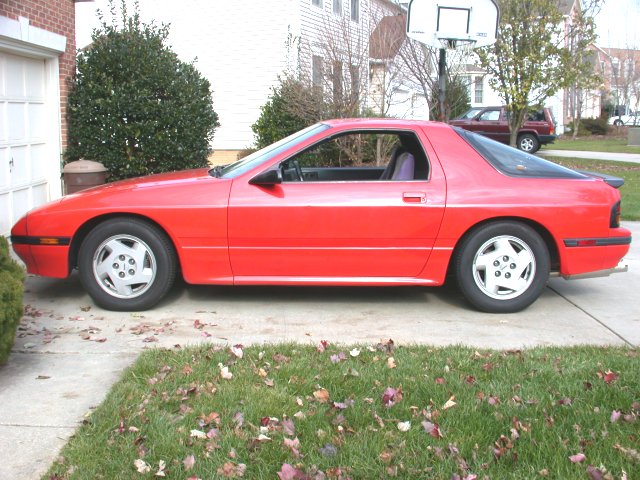
So you think I've made some progress? Not so fast. Consider that the suspension is essentially all original. The rear shocks had been replaced recently but the car still rode like a ‘70's Lincoln, bobbing and swaying this way and that way depending more so on which way the wind was blowing than the actual road conditions. In short it did not handle well at all. And then there is the passive rear steering that Mazda designed into the suspension. On a new car the handling is quirky. On a 17 year old car it was downright scary. So a complete overhaul of the suspension was in order and really needed to support the added loads of R-compound tires on the track. Now it was bad enough working on the rust repair but I had nightmares about seized bolt after seized bolt while attempting to work on the suspension. The suspension was essentially one big rust wad. Gotta do what you gotta do. So I ordered Koni Yellow (single adjustable) strut inserts for the front and shocks for the rear and a GC coil over kit with Eibach springs (7" x 2.5" dia. springs 400lb/in front, 275lb/in rear). This is one area that I did not want to scrimp on. But the shocks were bought from the cheapest online source I could find and the GC kit was bought though a friend with GC distributor connection so there was some pretty good discounts involved there too. With the suspension off it is easiest to just do everything at once so I ordered a Prothane bushing kit and a set of urethane rear steer bushing eliminators from...you guessed it Corksport. As expected the stock rubber bushings were toast - dry rotted and splitting in every direction. Good thing they were replaced. Now when adding a ride height adjustable suspension with plans to lower the car the alignment goes to crap. So bad in fact that the car can no longer be aligned using the factory hardware. So in the front, adjustable camber plates are needed and an adjustable camber “link” for the rear also. A no name adjustable (on the car) rear camber link was bought used and Cusco front adjustable camber plates were sourced off eBay for $100 less than new.
One of the reasons people shy away from the Koni’s is that the front units are strut “inserts” only. In the front the OE strut housings have to be reused, the rears are simply replacement shocks. To install the front inserts, one must release the pressure from the OE strut and cut the top off removing the piston shaft and the guts of the shock, then install the Koni strut insert into the old strut housing.

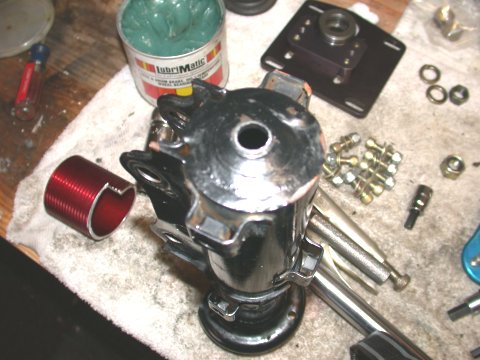
It actually went very smoothly for me. But I could in no way have used my original struts. And when I say original I mean 168,000 mile units. They were so rusted and blistered it looked like the strut bolt flanges would crumble if you so much as breathed on them. Trash.
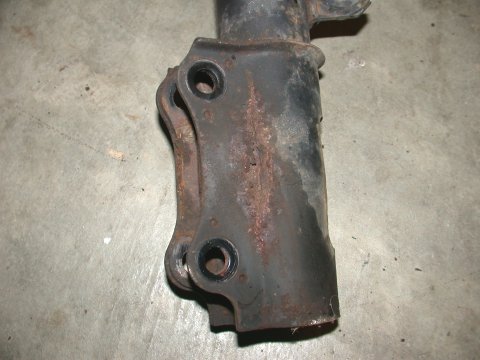
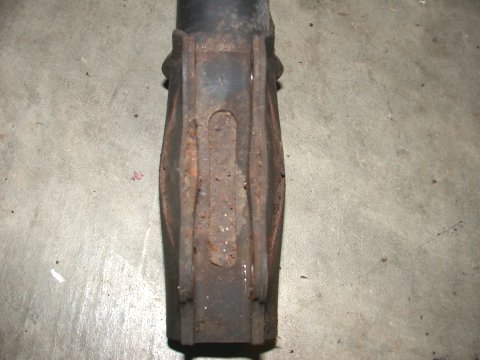
Would you have reused these? Pictured: the blistered lower strut flanges.
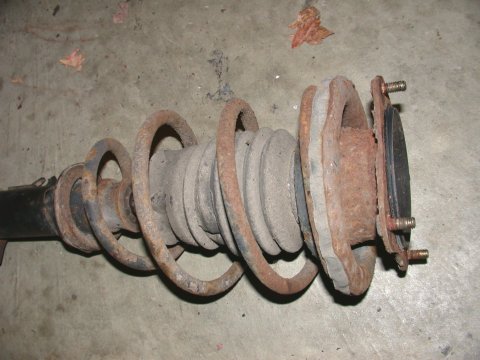
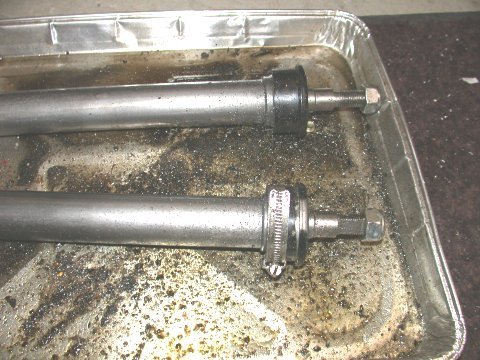
168,000 miles on this unit. Time to retire it. As painful as it was
the "new" struts were cut open and the guts removed.
So I had to find a set of reasonably good OE struts to use as the housings. Lucky for me I found a pair of very low mileage (>1000 miles) front struts for $60. With these in hand they were opened up and the Koni’s installed. The GC springs and perches were installed and the OE bump stops cut and reused. All was bolted up to the Cusco camber plates and they were ready to go on the car. But first the bushings. Prothane provides lower control arm bushings for the front suspension. So the old bushings were cut, hacked, sawed, and pressed out of the lower control arms. I was able to remove the old bushings and install the new bushings with just my bench vice as a press. Success. With bushings in place, the whole package was reassembled. Oh and while the front end was apart I installed Prothane urethane front say bar bushings.
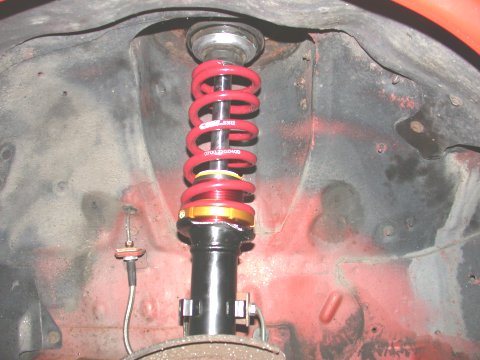
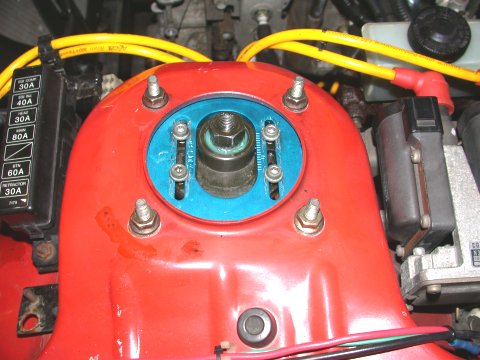
The installed new front strut assembly. Cusco adjustable camber plates [to be replaced by GC plates later].
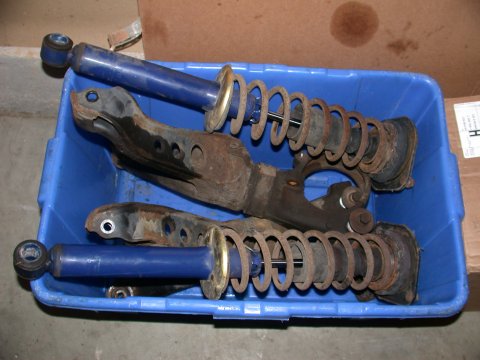
The rear suspension on the other hand proved to be much more challenging. First off the rear lower control arm removal requires pretty much disassembling the entire rear end of the car. Disconnect sway bar, unbolt brake caliper from hub, remove brake rotor, cut off brake rotor splash shields, disconnect toe links, press out axle half shaft from hub, remove shock absorber assembly, unbolt hub from lower control arm, and then and only then can you unbolt and remove the monstrous lower control arm to replace that single bushing. And removing the lower control arm is no mean feat either. The camber bolt hits the chassis before it is out far enough to allow removal of the lower control arm. Lots of angling, busted knuckles, and cursing and swearing are involved here before the control arm cries uncle. In the process of doing this whole rear suspension exercise I snapped only two bolts, which required drilling and retapping the holes. I did use almost a whole can of PB Blaster. And unfortunately I did notice a very loose toe link ball joint. What a pain.
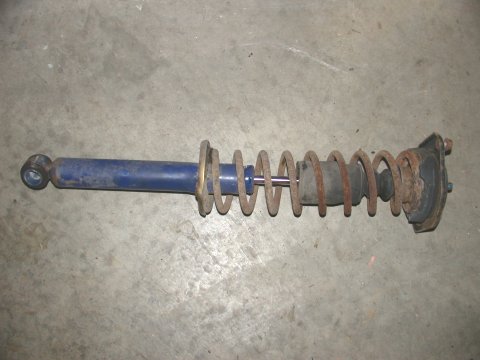

The old rear shock assembly removed - some kind of aftermarket unit.
The halfway point with the rear suspesnion completely in pieces.
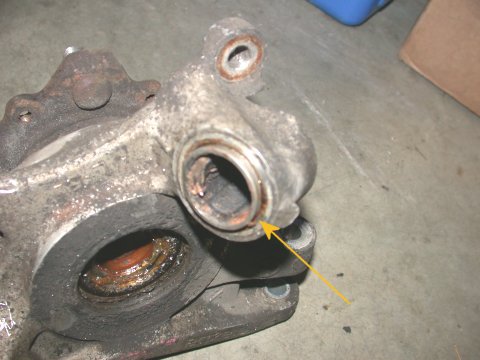
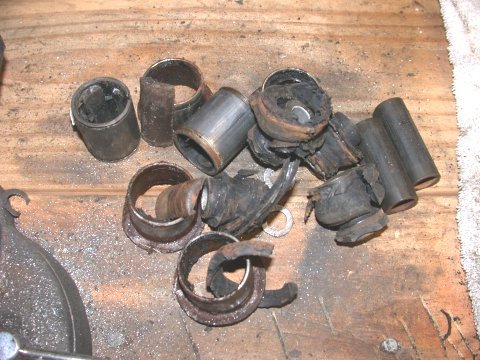
And then there were the OE rear steering toe bushings that would not come out. The bushing sleeve had seized to the bolt and turned the whole rubber bushing inside the casing leaving crumbled rubber, a bolt sleeve combo, and the casing in the hub. A big mess. With everything apart I went to my trusty bench vise to press out the old bushings/casings. Poor little bench vise wasn’t up for this task. So off to a friends shop where a 25 ton press was available.
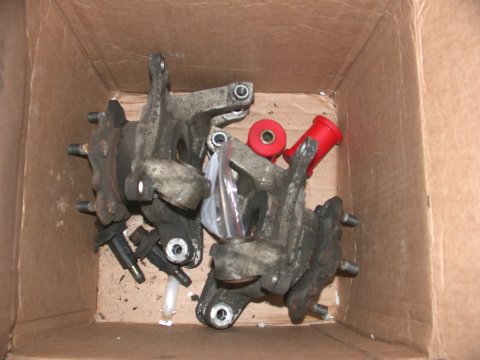
At the shop with the right tools the bushings came out like melted butter under the press. Once the old bushing garbage was removed the new bushings were installed with no issues. So now it was just reassembly. Getting the lower control arms back in without buggering up the nice new bushings was tough. The camber bolts I fed in from the “inside” when reinstalling the control arms....”easier” that way. With a large pickle fork and an impact gun I was able to pop the loose *but seized* toe link ball joint nut after about a hour fighting with it, clean up the threads and reseat it tightly with a new locknut. Whew...that could have been a tough one.
The Koni shock is assembled with new springs and GC perches and cut bump stops and reinstalled. The ball joints and wheel bearings all looked and felt tight so no worries there. And last but not least swapping in the new rear adjustable camber link. All this was a piece of cake right? HA! On my schedule about 4 days solid worth of effort but boy what an improvement. Rusty is actually beginning to feel like a race car now and not just sound like one.
SUSPENSION 1:
New “used” front struts (for the housings) (used)
$80 (incl shipping)
Koni adjustable front strut inserts (new)
$330.40
Koni adjustable rear shocks (new)
$232.40
Ground Control kit (new)
$350.00
Prothane Bushing kit (new)
$95.00
Corksport urethane rear toe steer eliminator bushings (new)
$53.00
Adjustable rear camber bar (used)
$95.00
Cusco front adjustable front camber plates (used)
$172.00
Volk Racing Wheel spacers (new)
$200.00
7-UP CLUB
MAIN
OUR "LOCAL7"
COMMUNITY | THE
WORLD OF THE RX-7
This page last updated April 12, 2004