

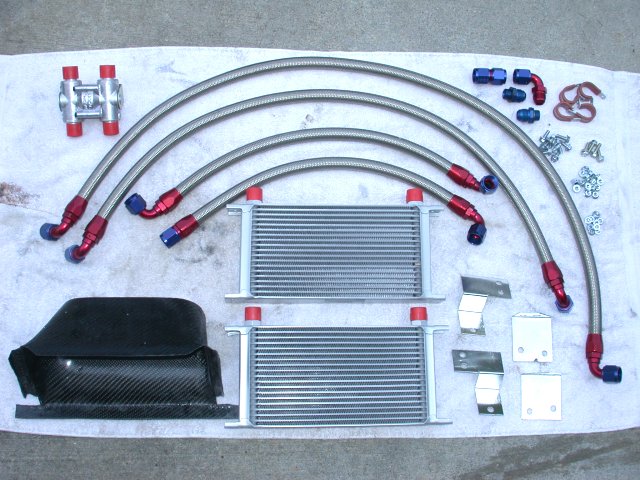
As we are all aware the handicap of the FD RX-7 is cooling. How do you keep such an inferno of an engine cool given the restrictions inherent in the engine package? Many things we do are focussed on the cooling system directly. Bigger radiator, better ducting, more water in the coolant mixture, drilled thermostat, etc. And then there are "bigger" related items like an aftermarket nose and vented hood. Well one thing to consider, which most over look is the oil system. Oil performs two functions, lubrication AND cooling! A few years ago at a track event, I overheard Jim Downings chief mechanic (I forget his name) say that the oil system for a rotary performs about 40% of the engine cooling function. 40%! Yikes. Since then I have been watching my oil temps via an oil temperature gauge and was amazed at the temps I was seeing. On the whole oil temps correlated very closely to coolant temps. A drop in coolent temp was followed by a drop on oil temp. Similarly when one went up so did the other. You don't need to be a rocket scientist to see the effect of oil cooling on engine temps. As another data point two of my track friends with virtually identical cars to mine, driven at roughly the same performance level as mine had installed the CWR dual oil cooler kit and were seeing oil temps 5-10degF lower than what I was seeing. And my R1 had the OE dual oil coolers! Woe is he who only has just the ONE OE cooler. This was not good. So given the fact that I was seeing oil temps on a hot day at the track approaching 250degF, the 40% heat rejection load number for the oil system, and the direct comparison between my friends cars and my own I decided upgrading the oil coolers would be a wise investment to ensure the longevity of my car. Choosing among the available upgrades was not hard. Price was the biggest factor as the kits were essentially the same with the exception that the CWR kit comes with carbon fiber ducts. The others were questionable. CWR it was. The CWR uses 19 row MOCAL oil coolers with form fitted carbon fiber ducts. SS lines are supplied terminated with -10 AN fittings made by XRP. A MOCAL thermostat is also supplied and adapters to mate the AN hardware to the factory oil connections. Brackets to hang the oil coolers is also included. It shoudl be noted that although I chose to upgrade both my OE coolers CWR offers a kit to simply add a passenger side MOAL cooler to an existing single OE drivers side oil cooler for about half the price.
All I can say is be prepared for a long and time consuming job with this install. It's not hard but involves a lot of parts removal and reinstallation...mostly of the OE components. To begin the disassembly one must remove the stock cooler(s). Some have performed this job working through the headlight and turn signal openings but I like to see what I'm actually working on so I decided to remove the nose/bumper. Not hard at all, 4 10mm bolts along the top, 3 10mm bolts on each side, and disconnecting a few electrical connectors and it comes right off (after removing the undertrays of course).

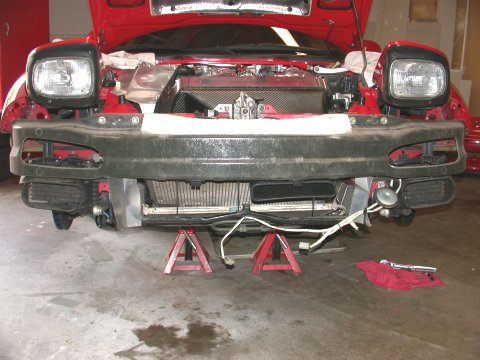
The OE coolers (pictured below is the drivers side) are fairly large in size. The drivers side is a 10 row and the passenger side a 9 row. Why the difference I don't know? It's hard to see pictured below but there are plastic oil cooler ducts sealed to the cooler itself with a rubber flap. However, because of the "awkward" shape of the cooler, the seal is anything but tight. And in my case many of the rivets holding the rubber flap to the duct had failed so the ducting was pretty ineffective.
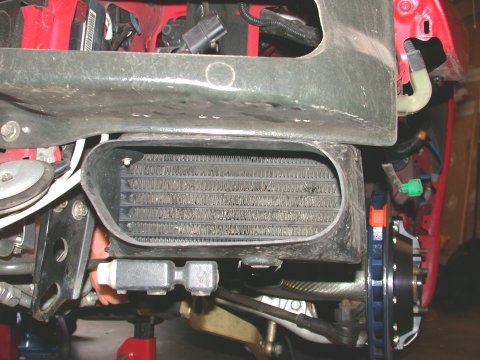
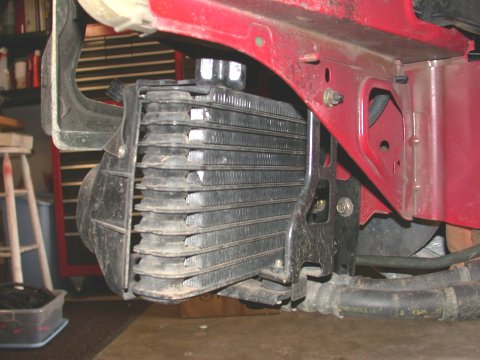
| Probably one of the biggest considerations when sizing replacement coolers is will they fit. Packaging is tough. Commensurate is also getting clean airflow to the cooler itself. IMO a huge 40 row cooler, even if it can be made to fit in the space available, isn't going to be that much better than a 30 row simply because of the size of the opening in the nose that feeds air to it. Given this the efficiencies are not necessarily gained in the dimensional size of the cooler but in the efficiency of the cooler design itself. Seeing the MOCAL cooler next to the OE cooler one might ask how can it be better? The gains are in the number of rows, which equates to more surface area and thus better heat rejection capability. Add to this the carbon fiber CWR ductwork which seals much better than the flimsy OE ducts and thus more air fed through the cooler itself result in a far greater cooling effectiveness. |
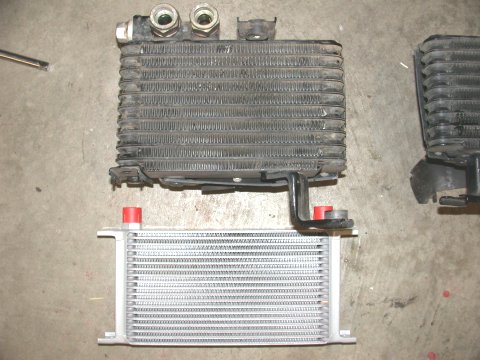
10 row OE cooler top vs 19 row MOCAL below. Just to the right is the 9 row OE passenger side cooler. |
|---|
Next we turn our attention to the engine bay. This is where things really get ugly. Somehwere in there are the OE oil cooler lines. One line feeds into the engine front cover and the other runs back to the oil filter tower. The former is a piece of cake, the rear oil filter tower line however is another story. The rear line is actually a hard line that is bolted to the block between the block and the AC compressor/power steering pump bracket. So it's not merely a case of disconnecting each end of the oil line and pulling the line out. Nope. Have to unbolt the entire AC compressor/PS pump bracket! This is of course after you have removed the IC and ductwork and piping and if it's still there your battery and tray.


So how do you get to that oil cooler line? Remove the accessory belt, remove the PS pump pulley (with an air tool) and unbolt the PS pump - the lines are flexible so the pump can be gently moved to the side with disconnecting any lines, unbolt the AC compressor and it too gently moved to the side - be careful to not kink the aluminum hard lines. With the AC compressor and PS pump unbolted, next the bracket itself can be unbolted from the engine block such that the oil cooler line can be removed. I chose just to remove the bracket entirely to make things easier and avoid damaging any wiring or hoses while ripping out that pesky oil line. As an aside, with the PS pump loose I was able to flip it upside down and drain the 11 year old PS fluid from the reservior and replace it with fresh fluid. There was all kinda nasty sediment in the bottom. The only remaing hard part is pulling, tugging, and prying the hard oil line x-over piping that runs between the two oil coolers out of the car. I managed to get it out in one piece, dunno how, but I did.
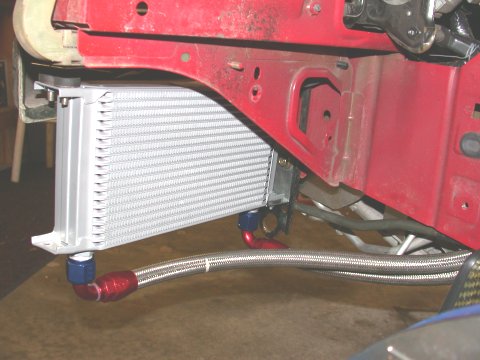
The half way point. Now the time has come to install the new stuff. With no directions and a handful of brackets and hardware I had but no choice to call in some reinforcement, namely my friends to tell me how the heck they hung the coolers with the brackets supplied. Hopefully the pics below will help anyone else figure out this chinese puzzle. Note that the left and right side hangers are indeed different. As an added measure I chose to use some rubber vibration isolators to be consistent with the OE design. In addition some rubber flat "washers" were used everywhere else. Not hard to do but you will need to source your own longer bolts to accommodate the rubber peices. I used virtually none of what was supplied with the kit.
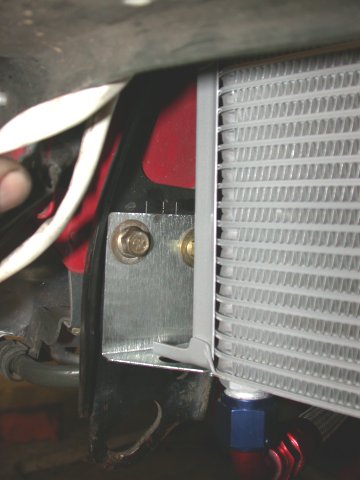
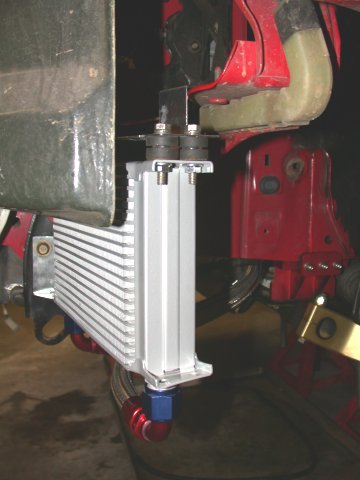
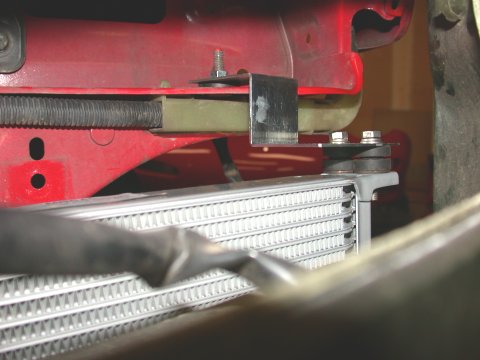
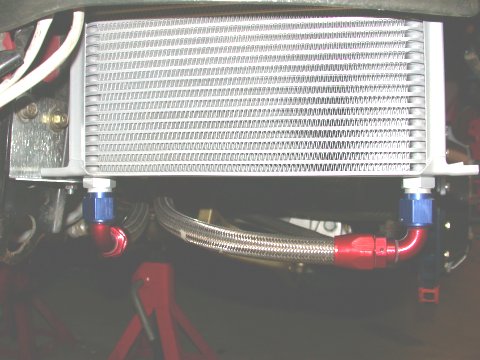
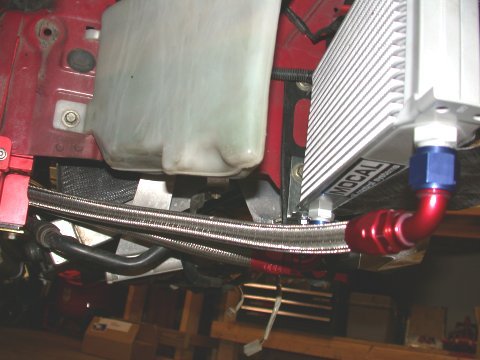
Next up are the SS replacement lines. Running the lines is fairly straigth forward.
I had some concerns about the misalignment of the 90 degree elbows on the end of each line
but was advised they were swivel fittings and could be turned
without damage to the seals. I initially did a test fit to be sure I had all the lines in
the correct location and figured out what to do with the thermostat. The fittings are all
aluminum AN fittings so if a normal open end wrench is used it should be used with great
caution so as to 1) not over tighten and strip the fitting (I was not able to locate
a torque rating) and 2) to not round off the fitting itself. I was able to borrow
a real AN -8/-10 aluminum wrench - preferred if you can locate one. Although not required
I also used a bit of thread sealant on each fitting.
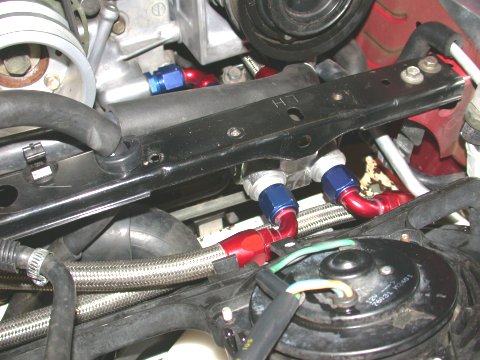
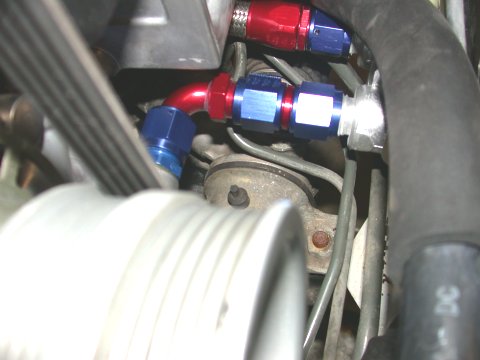
Perhaps the biggest engineering challenge was what to do with the thermostat.
There was no place to hang it, and it's location made it difficult to secure it to
anything. Compounding the issue is the way the t'stat was attached to the front
cover via a 90degree elbow and a female to female adapter - essentially hard mounted.
Several instances have been noted of failure of the 90degree elbow
or of the front cover fitting working it's way loose over time due
to movement of the engine relative to the essentially rigid
oil lines and t-stat. In short not much can be done here so do the best
you can. With all the lines hooked up the t'stat is fairly stable and I merely
used a big 4" dia screw type hose clamp loosely tightened to sorta hold the
t'stat in place and reduce loads on the fittings. Time will tell if I got it right.
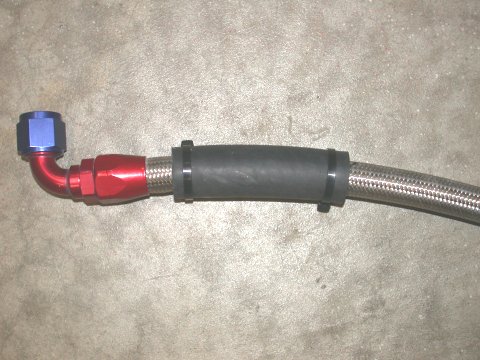
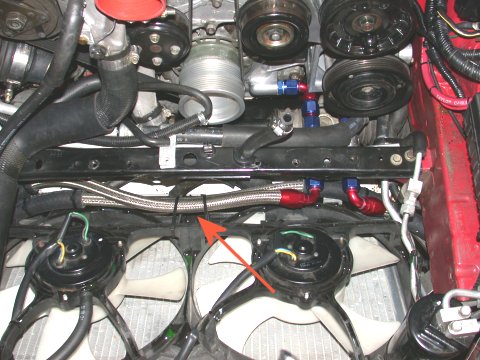
Some other precautions I took were to trim the corners off the radiator shroud near the frame
rails and sheathing of the SS oil lines with rubber heater hose secured with zip-ties to avoid
chafing of the oil line wherever there was any contact with another object. Basically near
the frame rails and for the line the runs under the AC compressor. Careful attention was made
to make sure there was no intereference with steering operation or any line than might contact
a spinning fan blade.
 |
With everything secure it was time to button
everything up, reinstall the nose and move on to the next project. Just take note that
although the total volume of oil is slightly more than the stock volume, oil changes
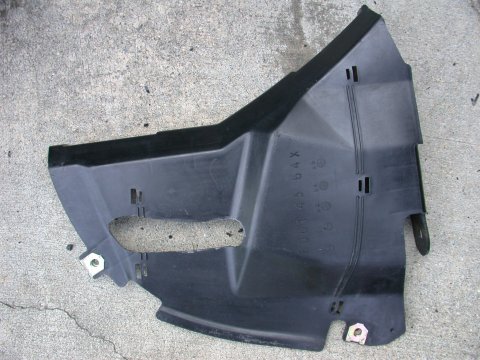
will be the same as it's only the oil pan that is getting drained. ..... Tick tock tick tock tick tock .... So you think you're done? Not so fast! There's one more hurdle to overcome...The OE oil cooler undertrays which conveniently will not fit anymore. |
|---|
There are two options when reinstalling the undertrays 1) bend the crap out of them and
use zip-ties liberally or 2) cut a hole in the plastic undertray so they can be refit using the original
hardware. I chose option 2. Personally I hate to see zip ties used where not needed.
Plus to remove the undertrays you would have to cut everything and use
new zip ties...what a pain.
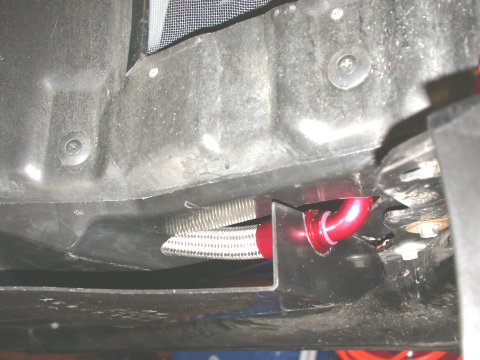
At the end of these write-ups I always like to show a nice picture of the finished product
but in this case there really isn't much at all to show or see. Very little "bling bling"
with this upgrade so don't plan on many "Oooos" and "ahhhhhs" from your friends unless they
are true track junkies like myself.

TRIPLE-R
MAIN PAGE
GENERAL
OVERVIEW | THE
HEART OF THE BEAST | STOPPING
AND TURNING | THE
COMFORT ZONE