"A windfall" is all I can say. I was lucky enough to happen
upon a used set of track wheels and tires. They were from a well known car and
one I was quite familiar with. So there was no question of their condition or the
reliability of the seller. I wanted them! Could I afford them? No, not really, but
at the sellers asking price how could I refuse. These are items I have lusted after since I
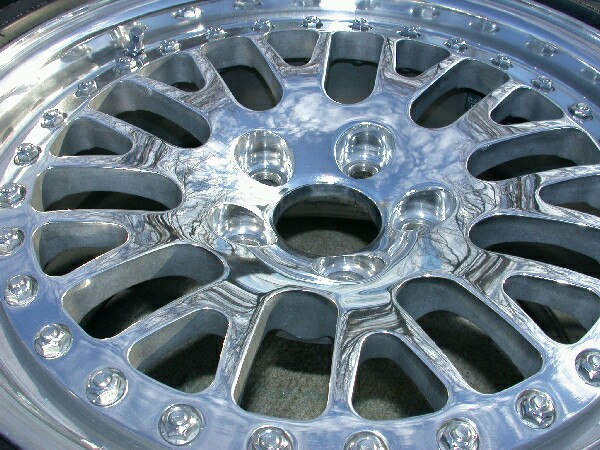
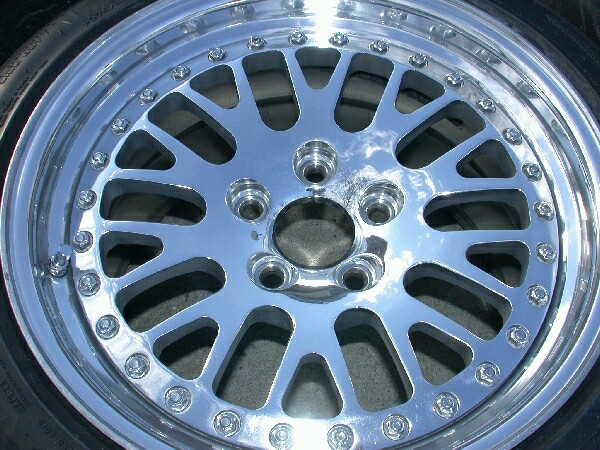
first started tracking the car in 1998. So what are they? They are three piece forged aluminum
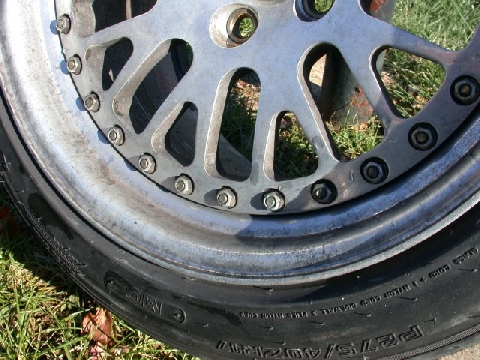
wheels manufactured by John Purner atComplete Custom Wheel (CCW), shod with Hoosier R3S03
road race tires. They are the hubcentric track version with no center caps. Apparently the street
verison uses the center caps for centering the hub and has the mountng bolts around the rim halves
reversed, i.e., the bolt heads are on the outside. It's prettier that way, not that it matters to me.
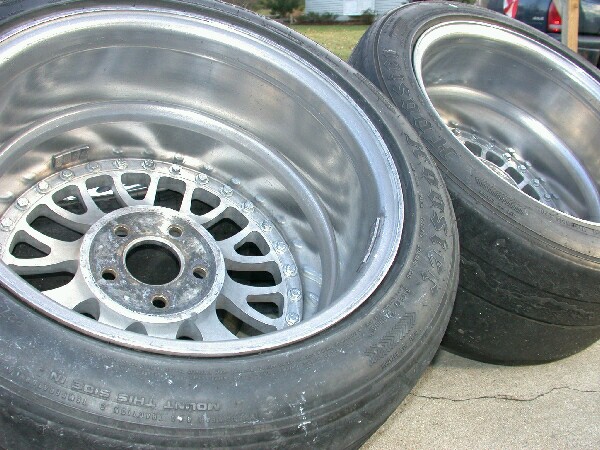
The wheels are W-I-D-E! The front rims are 17"x10 1/2" and the rears are
17"x11" both with 275/40ZR17 tires. I'm unclear of the offset but because they came off
a 3rd gen RX-7 they should fit my car....I hope. The conditions were though that a
coilover suspension be fitted (got that) and rear tubular trailing arms be fitted (got those).
So far so good. Well almost, the suspension toe links and trailing arms, that I picked up
second hand - brand new, are still on my workbench. So now a real need is here to
actually install them. I had seen these actual wheels before and the tires were reported
as used but with tread, so no biggie. I expected a used set of wheels and tires and that's
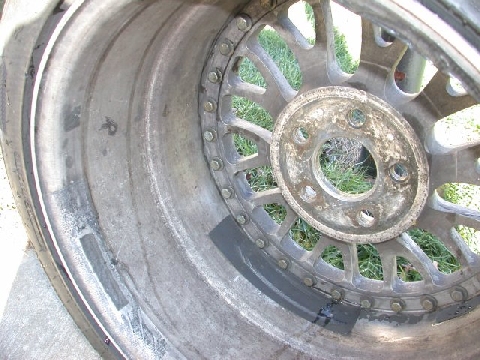
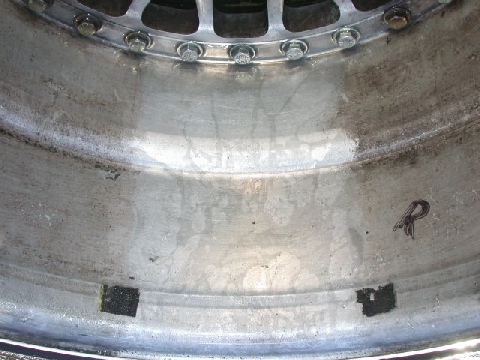
what I got. But they hadn't been really cleaned in, I'd guess, the 6+ years of track use
they'd seen other than a spritz with a bit of soap and water every year or so. They were pretty grungy
in other words. So I set to work!
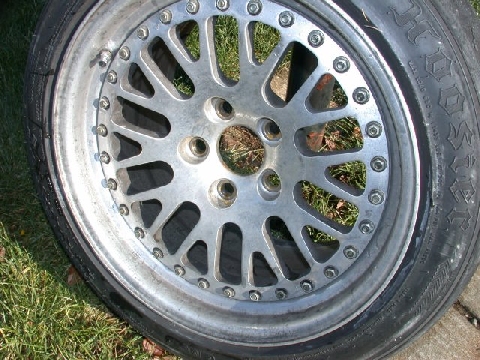
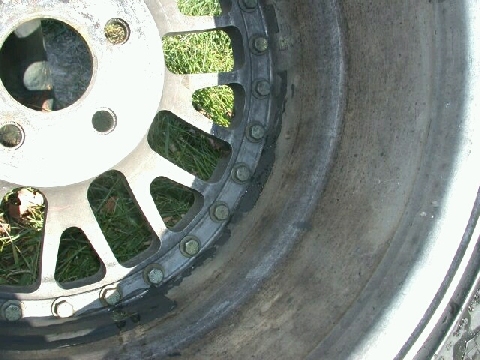
Brake dust is nasty stuff. Especially dust from racing compound pads.
Brake dust is hot, abrasive and corrosive....especially when wet. From my own experience I found when the pad dust got
wet it would form a paste that would then harden when exposed to brake heat and literally bake itself onto the wheel.
And the longer it stayed on the wheels the harder it was to get off. With my current SSRs I would clean then the next day after a track weekend
and after 3 years of heavy track use they still look pretty good. These CCWs, however, were in pretty
sad shape, but perfect for a track wheels. But a little cleaning wouldn't hurt.
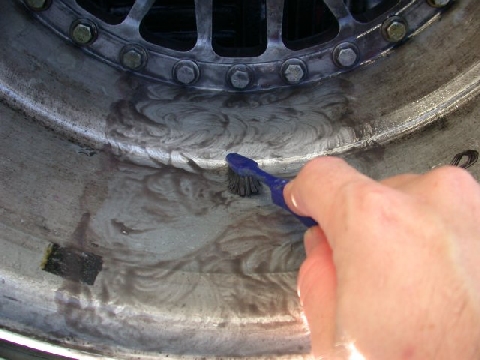
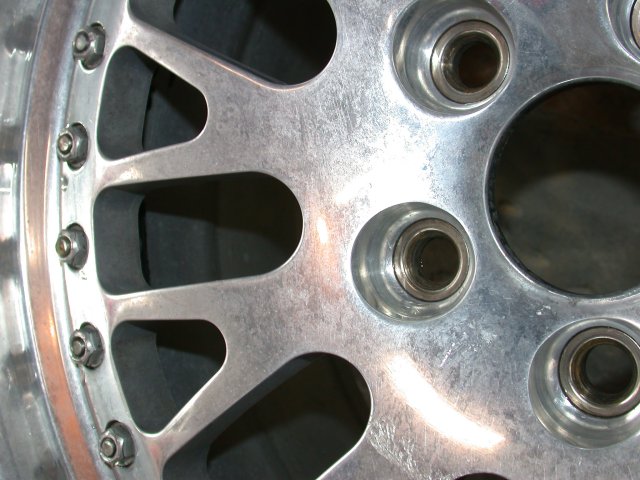
Not much to say about polishing. I use Mothers. Best stuff I've ever tried. Nothing works
as well in my opinion. I use terry cloth towels only and work about 4" to 6" square at a time, or about 3-4 spokes.
Wear rubber gloves or else your hands will be black for a week. Polishing time per wheel 2-3 hours.
The polishing went well and the acid burns from the Navel Jelly came out easily but some other defects
became much more apparent.

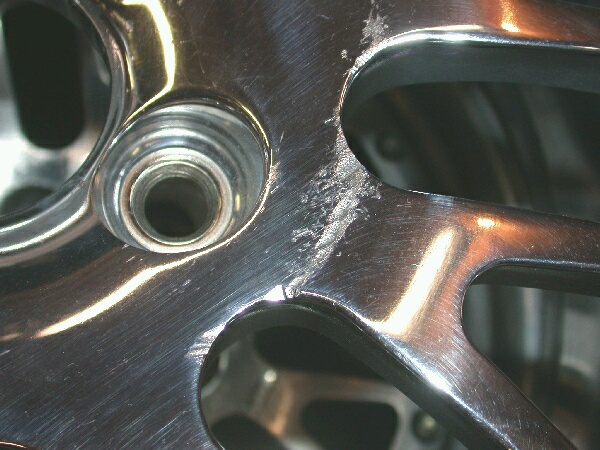
Way back in time, my thoughts are the wheels were stored on a little
trailer, perhaps with a chain or something because in a circular pattern around the wheel center was some
significant gouges, scratches, cuts, .....what ever. These were on at least 4 of the spokes on each rim.
They were ugly and had to go. Whats the point of polishing things up nice if there are these
marks on the front of each rim? So I broke out the dremel
and some sandpaper and set to work to clean up the problem areas. I used some pretty rough emery
paper (probably 100grit) to smooth out the surface and get rid of the blemish (done dry), followed
by 400grit (done wet), then 800grit (wet), then 2500grit (wet). You can hardly feel the 2500 but it
does a great job of prepping the surface for polishing. For more on my polishing technique
see here.
After the 2500 grit a hand polish with the Mothers and the blemish is essentially gone.
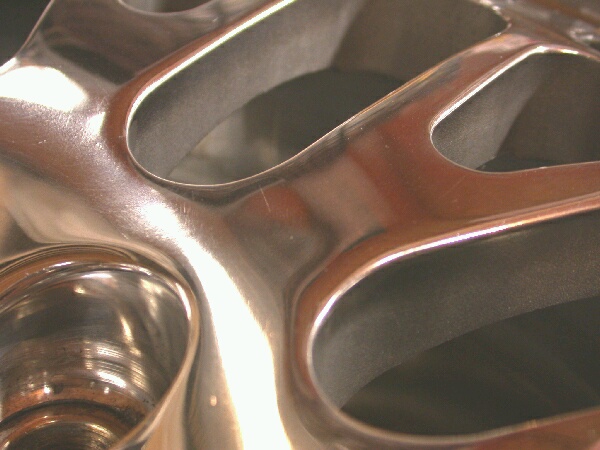
Well after all is said and done, roughly 35 hours of work, I'm very pleased with the results. I ended up with a set
of rims that look brand spankin' new and a set of tires with a least a half a season left in them for about 1/3
the cost - a savings of almost $2000! Now to go take them out on the track and mess 'em all up again!